Exercise 4: Create a renderer for a custom control
In this exercise, you'll create the platform-specific renderers for the custom drawing surface created in the previous exercise.
The provided Assets folder contains a custom control for each platform that'll present a drawing surface, respond to pointer events and draw lines. Your job is to consume the custom control on each platform in a renderer.
This exercise includes steps for all platforms supported by Xamarin.Forms. You're not required to complete the steps for every platform but it's recommend you run the exercises on at least 2.

To complete the exercise, you will need Visual Studio for Windows or macOS with the Xamarin development tools installed. You will also need either an emulator/simulator or a device to run the exercise on. Please see the setup page if you need help installing the Xamarin development environment.
Open the starter solution
This exercise is a continuation of the previous exercise. You can use your existing solution or begin from the prior Exercise 3 > Completed solution in your copy of the cloned or downloaded course materials.
If you're using Visual Studio on Windows, you'll see all of the platform or head projects: iOS, Android and Windows. If you're using macOS, the Windows projects will be disabled (grayed out).
Add platform-specific custom controls
Creating a configurable drawing control on each platform requires platform-specific knowledge.
For simplicity, we've included the touch and gesture enabled drawing code for iOS and Android. We've also provided similar code for the Windows platforms. The provided classes need to be added to each head-project.
- Add the appropriate PaintView class to each platform-specific project.
-
Optionally - inspect the code on each platform. Notice that the PaintView class shares some similarities across all platforms:
- The class name is PaintView
- There's a public method named SetInkColor
- There's a public method named Clear
- There's an event named LineDrawn
- You'll use these when you create the renderer on each platform.
Create the renderer on each platform
You'll create the renderers to display the custom PaintView control on each platform. Because we've designed the PaintView control to expose the same public methods on each platform, the steps for creating each renderer are very similar. Keep in mind, this won't be true for all renderers.
Repeat the steps below for each platform in the platform specific projects. You'll need to add the platform specific using statements as you build the renderer.
- Create a new class named SketchViewRenderer.
-
Update the signature to derive from
ViewRenderer. The first type argument is the element; useSketchView. The second type element is the native control; usePaintView. -
Add the
ExportRendererassembly attribute above the namespace declaration to connect theSketchViewRendererto theSketchView. -
Android only: Create a constructor that accepts an Android
Contextand passes it to the base constructor.
using XFDraw;
using Xamarin.Forms;
using Xamarin.Forms.Platform.[platform];
using XFDraw.[platform];

[assembly: ExportRenderer(typeof(SketchView), typeof(SketchViewRenderer))]
namespace XFDraw.[platform]
{
    class SketchViewRenderer : ViewRenderer<SketchView, PaintView>
    {

    }
}
Create and set the native control
-
In each renderer, override
OnElementChanged. -
Create and instantiate a local
PaintViewinstance named paintView. On Android you'll need to pass in the context:Android.App.Application.Context; on the other platforms the constructor takes no parameters. -
Set the color on paintView using the
SetInkColormethod. You can reach the bindableInkColorproperty onElement. On Android and iOS, there are extension methods to convert the Xamarin.Forms color to a native color:ToUIColorandToAndroid. On Windows you can add the method below to convert to a Xamarin.FormsColorto aWindows.UI.Color.Windows.UI.Color GetWindowsColor(Color color) { return Windows.UI.Color.FromArgb((byte)(255 * color.A), (byte)(255 * color.R), (byte)(255 * color.G), (byte)(255 * color.B)); } -
Assign paintView as the native
controlusing theSetNativeControlmethod. On Android, you'll need to pass in theContextthat you receive in the renderer's constructor. -
The above code should only be performed once. Surround the code in an
ifstatement thatonlyexecutes ifControlisnull. -
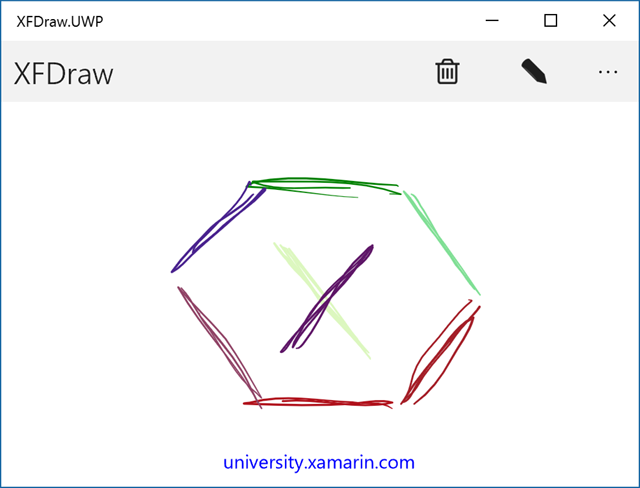
Run the application, you should now be able to draw by dragging your finger.
protected override void OnElementChanged(ElementChangedEventArgs<SketchView> e)
{
    base.OnElementChanged(e);

    if (Control == null)
    {
        var paintView = new PaintView();
        paintView.SetInkColor(GetWindowsColor(this.Element.InkColor));
        SetNativeControl(paintView);
    }
}
Respond to color property changes
You want to ensure the native control is updated when properties are changed on the Xamarin.Forms element.
-
Override
OnElementPropertyChanged. -
The passed in
PropertyChangedEventArgshas aPropertyNameproperty which holds exactly what you'd expect: the name of the property on the element. Compare this to the name of yourInkProperty. You can do this is a type-safe manner by checking the staticSketchView.InkColorProperty.PropertyName. -
If the property name is correct, update the ink property on the native control using the
InkColorproperty on the element.
protected override void OnElementPropertyChanged(object sender, PropertyChangedEventArgs e)
{
    base.OnElementPropertyChanged(sender, e);

    if (e.PropertyName == SketchView.InkColorProperty.PropertyName)
    {
        Control.SetInkColor(GetWindowsColor(Element.InkColor));
    }
}
Change the color property
You'll trigger an ink color change from your UI.
- Open MainPage.xaml.cs in the shared project.
-
Set a new random color every time the "Color changed" button is pressed. The OnColorClicked method is already being called when the button is tapped, but the method body is empty. Use the provided
GetRandomColormethod to assign a new color to sketchView'sInkColorproperty.void OnColorClicked () { sketchView.InkColor = GetRandomColor(); } -
Optional: update the background of the Android floating action button when a new color is assigned.
actionButton.Click += (s, e) => { OnColorClicked(); actionButton.BackgroundTintList = Android.Content.Res.ColorStateList.ValueOf(sketchView.InkColor.ToAndroid()); }; - Run the application. On Android, press the floating action button to change colors. On the other platforms, press the toolbar button.
Exercise summary
In this exercise you created renderers that instantiate custom, platform specific controls for a custom defined Xamarin.Forms element. You also created and used a bindable property to update the renderers.
You can view the completed solution in the Exercise 4 > Completed folder of your copy of the cloned or downloaded course materials.