Exercise 3: Access a SQLite database with SQLite.Net
In this exercise, you will define the database schema for a SQLite database and then create and connect to the database.
To complete the exercise, you will need Visual Studio for Windows or macOS with the Xamarin development tools installed. You will also need either an emulator/simulator or a device to run the exercise on. Please see the setup page if you need help installing the Xamarin development environment.
Open the starter solution
This exercise is a continuation of the previous exercise. You can use your existing solution or begin from the prior Exercise 2 > Completed solution in your copy of the cloned or downloaded course materials.
There are also assets you'll need from the Exercise 3 > Assets folder.
Define a SQLite.NET entity
First we need to create a model class that we can use to map to a table in our database.
- Add a new folder in the People Portable Class Library named Models.
- In the Models folder, create a new class named Person and ensure that it is
public. - Verify that the Person class is in the
People.Modelsnamespace.
namespace People.Models
{
    public class Person
    {
    }
}
- Add an
intproperty named Id. - Add a
stringproperty named Name.
public int Id { get; set; }
public string Name { get; set; }
Add SQLite annotations
We will add .NET attribute annotations to our People model object to help SQLite.NET map our class to a SQLite table.
- Add a using directive for the
SQLitenamespace. This will allow us to use the SQLite.NET attributes. - Annotate the Person class with the
[Table]attribute and specify the name as"people". - We will specify the property Id as our primary key. Annotate Id with the
[PrimaryKey]attribute and specify it[AutoIncrement]. - Add annotations to the Name property to add some constraints to the data. Specify its
[MaxLength]to be 250 and specify that each value in the column should be[Unique].
using SQLite;

namespace People.Models
{
    [Table("people")]
    public class Person
    {
        [PrimaryKey, AutoIncrement]
        public int Id { get; set; }

        [MaxLength(250), Unique]
        public string Name { get; set; }
    }
}
- Build your application and ensure it compiles before moving to the next step.
Add the repository class
Next, we need to add some pre-built code to the cross-platform project. This code has been supplied in the Exercise 3 > Assets folder of your copy of the cloned or downloaded course materials.
- Add the PersonRepository.cs C# source file from the Assets folder into the shared People project. An easy way to do that is to drag/drop it onto the project's root node in your solution explorer from the folder.
- Examine the repository class - it has some pre-supplied methods and a few
TODOmarkers where we will add some functionality to access the database.
| Method or Property | Description |
|---|---|
StatusMessage |
This property provides a string which reports the last success or fail message from the database. |
| constructor | The constructor initializes the underlying SQLite connection. |
AddNewPerson |
This method inserts a new Person record into the database. |
GetAllPeople |
This method returns all of the Person records from the database. |
Before the project will compile, we have to add some more functionality to our database repository class.
Connect to a database
Next, we need to add some code to work with a SQLite database on the device.
- Open the PersonRepository.cs source file.
- In the constructor, initialize a new
SQLiteConnectionand save it to a field named conn. - Use the
conn.CreateTablemethod to create a table to storePersondata.
private SQLiteConnection conn;
...
public PersonRepository(string dbPath)
{
    conn = new SQLiteConnection(dbPath);
    conn.CreateTable<Person>();
}
Read and write to the database
Next, let's implement the method to insert records into our SQLite database.
- In PersonRepository.cs, find the
AddNewPersonmethod. -
Add code to insert a new
Personobject.- There is a
TODOmarker in the method to show you where this code should go. - Using the DB connection field
conn, call theInsertmethod and pass in a newPersonobject with itsNameproperty set to thenameparameter. - Assign the return value to the
resultvariable that's already defined in the method.
- There is a
public void AddNewPerson(string name)
{
    int result = 0;
    try
    {
        //basic validation to ensure a name was entered
        if (string.IsNullOrEmpty(name))
            throw new Exception("Valid name required");

        result = conn.Insert(new Person { Name = name });
        ...
    }
    ...
}
Read from the database
Once we have records, we can read them by accessing the Table object we created in the constructor.
- In PersonRepository.cs, find the
GetAllPeoplemethod. - Use the the
Table<T>method to retrieve all of the records - this returns anIEnumerable<Person>object. - You cannot return the enumerator directly because a
List<Person>is expected. Use theToList()extension method to turn it into a valid type. - Optionally, you can include error handling by wrapping your code into a try-catch block. If there is an error, set the
StatusMessageproperty to the exception'sMessageand return an emptyList<Person>().
public List<Person> GetAllPeople()
{
    try
    {
        return conn.Table<Person>().ToList();
    }
    catch (Exception ex)
    {
        StatusMessage = string.Format("Failed to retrieve data. {0}", ex.Message);
    }

    return new List<Person>();
}
Connect the UI
Our final step is to add UI to call the methods populated in the previous step. We'll use a pre-built UI included with the Exercise 3 > Assets folder of your copy of the cloned or downloaded course materials..
- Replace the MainPage.xaml and MainPage.xaml.cs in the shared People project with the copies you have in the assets. You can copy the these directly into the folder structure and replace the existing files.
Finally, let's initialize the repository with our filename.
- Open the App.xaml.cs file in the PCL project and locate the constructor.
- Rename the passed parameter to
dbPathif it's something different. - Remove the
Textproperty setter on theMainPageobject—we no longer have that property since we just replaced the UI. - Add a public, static property named
PersonRepoto hold aPersonRepositoryobject. - Initialize the
PersonRepoproperty in the constructor by creating an instance ofPersonRepository, passing in thedbPathparameter to the repository constructor.
public class App : Application
{
    public static PersonRepository PersonRepo { get; private set; }

    public App(string dbPath)
    {
        InitializeComponent();

        PersonRepo = new PersonRepository(dbPath);

        MainPage = new MainPage();
    }
    ...
}
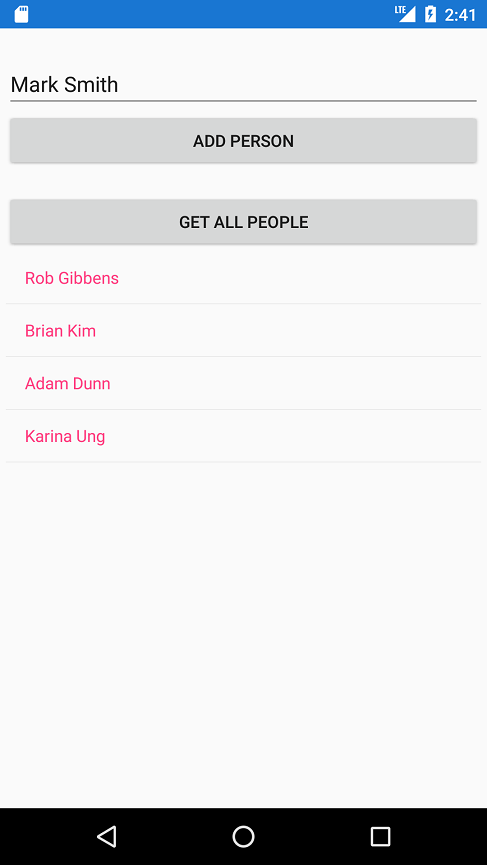
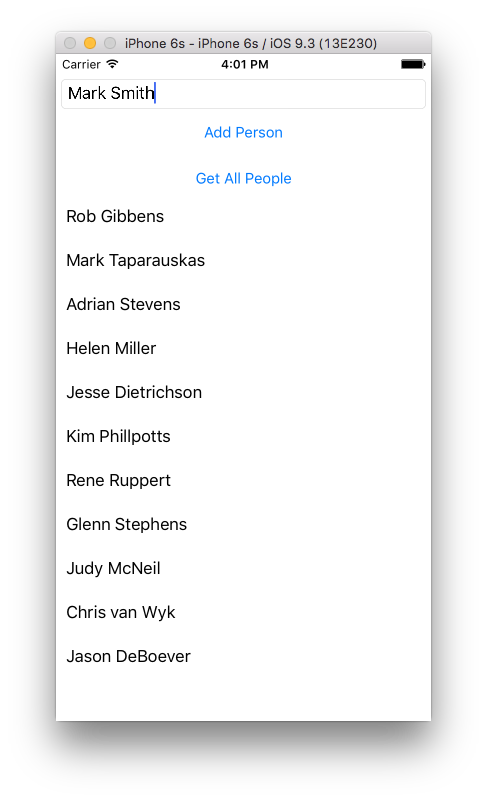
Run the application
Build the solution and run the application on at least one platform. Remember that for the Windows platforms, you will need to ensure you have selected a target CPU architecture.
- Tap the "Get All People" button to perform a
SELECT *from thePeopletable. Initially it will be empty. - Enter a name into the
Entryfield and tap theAdd Personbutton to add it to the database. You should see a status message appear. - Tap the "Get All People" button each time to show the changes to the underlying table.
Stop the application and run it again. You should see the data is persistent now that it's stored in a database file.
Sometimes, Visual Studio doesn't realize it needs to rebuild a .NET Standard project when you change files outside of the editor, like you may have done when you copied over MainPage.xaml and MainPage.xaml.cs. You can resolve this by forcing Visual Studio to rebuild the shared project: right-click the project and select Rebuild.
Exercise summary
In this exercise, we created and connected to a SQLite database, and performed basic CRUD (Create-Read-Update-Delete) operations.
You can view the completed solution in the Exercise 3 > Completed folder of your copy of the cloned or downloaded course materials.