Duration
45 minutes
Goals
In this exercise, you will modify a basic Xamarin.Forms application shell to include support to hit an existing SOAP-based service and manipulate the returned data. The UI has already been created, you will be filling in the web service access code.
Exercise Overview
Try to complete the exercise by using the following high-level instructions, and going into the step-by-step instructions if you need some guidance. You will be using a starter solution located in Exercise 1. This solution has projects for Xamarin.iOS, Xamarin.Android, and Windows UWP.
Your goal is to implement the four operations (Create, Get, Update and Delete) operations in the BookManager class in the Data folder of the project. There are //TODO comment markers in each method. You will not need to make any other changes to the project.
The Book SOAP service is located at http://xam150.azurewebsites.net/services/books.svc. Normally, you would create a client proxy using the SLSvcUtil.exe tool from the Silverlight SDK, but this step has already been done for you and the proxy is already in the starter project.
How do I generate a WCF proxy from WSDL?

Here are the valid operations you can perform from the proxy:
-
Call
LoginAsyncto get a token (if you don't pass this token to the other methods, you'll get an Unauthorized status returned). This will create a unique session for your application and will populate the session with a few default books. The first detail step below has a walk through for this step. - All other calls need to add the string-based token (with no quotes) as the HTTP "Authorization" header. This is what identifies you to the service. This is a bit complicated to do, so follow the instructions described below.
- Call
GetBooksAsyncto get a list of the books in your session. This will return an array ofbookobjects which look something like:public class Book { public string[] Authors { get; set; } public string Genre { get; set; } public string ISBN { get; set; } public System.DateTime PublishDate { get; set; } public string Title { get; set; } } -
Call
UpdateBookAsyncto update a book. -
Call
DeleteBookAsyncto delete a book, passing the ISBN code to identify the book. -
Call
CreateBookAsyncto add a new book, passing the book object as the parameter; note that the ISBN code must be empty and the response will include the book object with the ISBN key filled in. - Test each of these operations using the pre-built UI.
Steps
(Optional) Examine the existing starter solution
You will be modifying an existing Xamarin.Forms application, so as a first step, let's walk through the solution structure so you have a basic idea about the application.
-
Open the starter project contained in the Part01 Resources folder and examine the project structure. It has four projects in the solution:
Project Description BookClient This is the PCL which contains all the code to create and process the UI for the application. You will do all of your work in this project. There are two Pageclasses in the project, one for the main view which shows aListViewfor the books, and a second to add or edit a specific book. The Data folder has the two files you are primarily interested in.-
BookManageris a class you will modify in order to perform each operation with the SOAP service. -
Books.cs file is the generated proxy file which you can look at. This contains the above definition of the
Bookas well as the client proxy to access all the SOAP operations.
BookClient.Droid This is the Android platform-specific head project. BookClient.iOS This is the iOS platform-specific head project. BookClient.UWP This is the Windows UWP platform-specific head project. You can use this project if you are on Windows 10 and have the UWP SDK.
-
Add support to login to the service
The service requires you login first and get an authentication token. For simplicity, we aren't using any credentials or certificates - but you must call a specific endpoint first and then take the result of that and return it on each subsequent request in the HTTP header.
-
Open the
BookManagerclass in the Data folder in the BookClient project. This is the PCL project which has all our shared code. This is where all our work will be performed. -
First, add a constant string to the class to hit the base URL. The value for the string should be
"http://xam150.azurewebsites.net/services/books.svc". -
Since we will need to do this authentication once, but then add the token into the header for all other request, we will create a single method to create our
BooksClientobject to access the service. -
Create a new method in the class named
GetClientwhich returns aBooksClient. -
In the method, create a new
BooksClientinstance. Since this is a mobile application which does not have an application configuration file, we will need to use a constructor that takes the binding and endpoint address.-
Pass a new instance of a
BasicHttpBindingclass as the binding. This is the only binding available to Xamarin applications. You will need to add ausingstatement toSystem.ServiceModel. -
Pass your URL constant wrapped in an
EndpointAddressobject as the endpoint.
-
Pass a new instance of a
-
Add a new private field of type
stringto hold the authorization token. The completed lab names this field authorizationKey. -
Add a new method named
Loginwhich returns aTask<bool>.
The WCF proxy uses the event asynchronous pattern which involves wiring up an event completion handler and then calling a method to kick off the operation. The operations are all asynchronous and the final result is reported back on a worker thread through the event handler. This is an older technique which was created prior to the Task Parallel Framework and async / await keywords in C# 5. However, it turns out we can easily turn these methods into Task-based approaches to make them easier to consume in our mobile app. As an example, let's do this for the Login.
string authorizationKey;
...
public Task<bool> Login()
{
    var tcs = new TaskCompletionSource<bool>();

    var client = GetClient();

    client.LoginCompleted += (sender, e) => {
        if (e.Cancelled) {
            tcs.SetCanceled();
        } else if (e.Error != null) {
            tcs.SetException(e.Error);
        } else {
            authorizationKey = e.Result;
            tcs.SetResult(!string.IsNullOrEmpty(authorizationKey));
        }
    };

    client.LoginAsync();

    return tcs.Task;
}
The key to this approach is the TaskCompletionSource class. You don't use this class very often, but it's quite handy in this specific case where we are converting an older asynchronous style into the more modern Task-based approach.
First, we create a TaskCompletionSource<T> where T is the expected result from the asynchronous operation. Then we call our GetClient method to get the configured BooksClient object. We want to use the LoginAsync method, so first we wire up to the LoginCompleted event and add a handler to process the result. Then we call the LoginAsync method to kick off the operation. Finally, we return the Task property of the TaskCompletionSource.
In the completion event handler, we examine the passed event arguments to determine if the method was canceled, failed or was successful and trigger the appropriate flags on the TaskCompletionSource. If it was successful, we store off the authorization key and set the result of the completion source to a true/false value.
The client usage for this method is to use async / await just as they would on any Task based operation, the TaskCompletionSource provides the task mechanics without a real thread, instead relying on the WCF proxy thread to do the work. All of our methods will be implemented using this exact same pattern.
Add the authentication token to the HTTP header
The next step is to create a shared method which will add the authorization key we just obtained to the header collection of the WCF proxy when we call any of the other methods. We'll do this by calling a method before all our other calls to add the header information.
-
Add a new private method to the class named
AddHeader. It should return aTaskso we can retrieve any errors from the asynchronous Login call. -
If the authorization field is empty or blank, then call the
Loginmethod you just created to get the authentication token. Useasync / awaitto do this without blocking the UI thread. -
Next, we need to take the string and add it as header to any outgoing request. In WCF, this is done by modifying the
OperationContextwhich is a static class that is valid while you are processing a method call. We'll just assume one is present in this method and then make sure that all our actual client methods create one before calling this. Use the following code, you will need to add theSystem.ServiceModel.Channelsnamespace (just use ALT+ENTER on the unknown classes in red to get the IDE to add the namespace for you).
private async Task AddHeader()
{
    if (string.IsNullOrEmpty(authorizationKey)) {
        await Login();
    }

    // Add a SOAP Header to an outgoing request
    MessageHeader header = MessageHeader.CreateHeader(
        "Authorization", "", authorizationKey);
    OperationContext.Current.OutgoingMessageHeaders.Add(header);

    // Add the HTTP header version
    HttpRequestMessageProperty httpRequestProperty = new HttpRequestMessageProperty();
    httpRequestProperty.Headers["Authorization"] = authorizationKey;
    OperationContext.Current
        .OutgoingMessageProperties[HttpRequestMessageProperty.Name] = httpRequestProperty;
}
This code adds the header into two areas. The first block adds the header into the SOAP headers - this is in the XML envelope we discussed in the lecture and this is often where any out-of-band data would be placed. The second block adds it to the HTTP headers collection which is where our server expects it to be. We've included the first block just so you can see how to affect the SOAP headers, but it's technically not necessary for our service here. (Although it won't hurt to include it either - the service just won't look at it).
Get the list of books
Now that we can authenticate to the service, let's add our code to retrieve the books from the base Url.
-
In the BookManager.cs file, locate the method named
GetAllwhich returns aTask<IEnumerable<Book>>and delete the current implementation. -
Create a
TaskCompletionSource<IEnumerable<Book>>to hold the result. -
Use your
GetClientmethod to retrieve aBooksClientto work with. -
Use
GetBooksAsyncmethod on the proxy and theGetBooksCompletedevent to process the return result. -
The code structure should look almost identical to the
Loginmethod - returning theTaskof theTaskCompletionSource. Remember to mark the method asasync. -
Once you've got that in place, we need to add our header information and create an
OperationContextto work with (remember we said we'd need that). We do this by creating aOperationContextScopefor the BooksClient, and this must be disposed when we are finished with it. Since this is a bit confusing, here's the code you will need to add - fill in the TODO below:
public async Task<IEnumerable<Book>> GetAll()
{
    var tcs = new TaskCompletionSource<IEnumerable<Book>>();
    var client = GetClient();

    using (var context = new OperationContextScope(client.InnerChannel)) {
        await AddHeader();

        // TODO: Your code to call the service goes here -
        // use the client.GetBooksAsync method and GetBooksCompleted event.
        // structure it like you did Login.

        return await tcs.Task;
    }
}
- Run the application and press the Refresh icon in the toolbar (at the top or bottom depending on the platform, but the icon looks like a pair of arrows in a circle).
-
After a few seconds, the app should load a set of existing books and display them. Debug through the application if you do not see the data get loaded. Verify it is properly calling Login and then passing the authorization token into the
GetBooksAsynccall to retrieve the books.
GetAll method you just created. Feel free to open the completed solution to walk through the code, or you can continue adding support for Add, Update and Delete if you have time remaining in the exercise.
Add a new book
We are now displaying the books, let's add support to Add a new book using CreateBookAsync.
-
Open the
BookManagercode. Locate the method namedAddwhich takes a title, author and genre and returns aTask<Book>. -
In the method, create a new
Bookobject and populate the properties with the passed data:- Set the ISBN property to an empty string.
- Make sure to create a new
string[]to hold the passed Author (we only allow a single author here for simplicity, but you could expand this code if you like to allow for multiples using a comma separator or some other convention). - Set the
PublishDatetoDateTime.Now.
-
Get a client from your
GetClientmethod. -
Use the
CreateBookAsyncmethod and theCreateBookCompletedevent to create the new book. -
Follow the structure of the
GetAllmethod - make sure to callAddHeaderand to wrap the call in anOperationContextScopeblock to pass the headers along to the service. In this case, yourTaskCompletionSourceshould return abook. Remember to mark the method as async. - Build and run the application to try the logic - just press the Add button (looks like a [+] in the toolbar). Debug through the logic if it's not working properly. When you press the Add Book button, it should add the book and return you back to the main screen.
Update an existing book
We are now able to display and add new books, let's add the code necessary to update an existing book.
-
Open the
BookManagerclass and locate the method namedUpdatewhich takes aBookand returns aTask. -
In the method implementation, get a new client and use the
UpdateBookAsyncmethod to send a book to service. Use theUpdateBookCompletedevent to catch the completion. -
In this case, we don't have an explicit return type - but we want to return
Taskso that exceptions are properly returned back to the caller, and so the caller can use theawaitkeyword to pause the progress of the method until the asynchronous method is finished. -
However, there isn't a non-generic version of
TaskCompletionSource, so have it return astringwhich is the response message from the service (e.Result.Message). SinceTask<TResult>derives fromTask, it is acceptable to return this and the client is unaware there is a bit of data tagged with it. Note: we could just as easily use a boolean value.
Delete a book
The final operation we have is Delete. The code should be structured just like the update case.
-
Open the
BookManagerclass and find the method namedDeletewhich takes a string and returns aTask. -
In the method body, get a new client and use the
DeleteAsyncmethod and theDeleteBookCompletedevent handler. The response returns a status message just like the update did. -
Add a call to the new delete method into the
OnDeleteBookmethod in MainPage.xaml.cs. There's a comment marker where the code should go. - Finally, make sure to remove the book from the books collection when the web call is complete to update the UI.
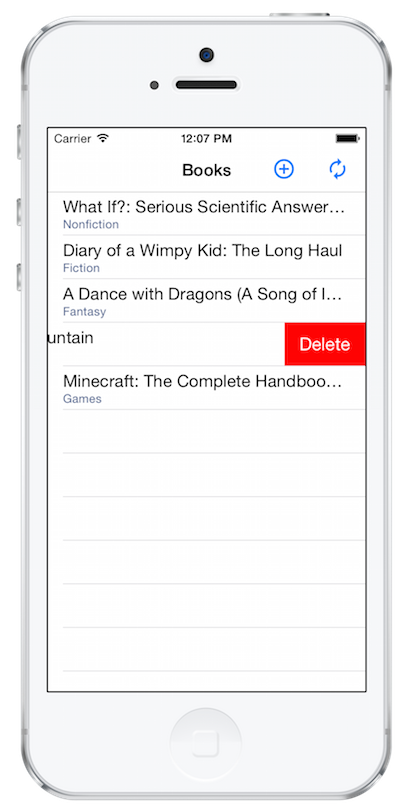
- Run the application to test the delete logic - you can get to the functionality by swiping to the left on iOS, or by performing a long-click on Android and Windows (press + hold).
Summary
Congratulations! You have successfully utilized a SOAP service within your Xamarin application to work with a set of books.