Exercise 2: Communicate with a book service
In this exercise you will extend a provided Xamarin.Forms application to work with an existing REST service which manages a library of books. You will authenticate with the service, retrieve existing books, add new books, update books and delete books from your bookshelf.
To complete the exercise, you will need Visual Studio for Windows or macOS with the Xamarin development tools installed. You will also need either an emulator/simulator or a device to run the exercise on. Please see the setup page if you need help installing the Xamarin development environment.
Explore the REST service
This exercise uses an existing REST service. This part covers the capabilities of the service; there is no code to write here.
The Book service is located at http://xam150.azurewebsites.net/api/books. This URL alone will return an HTTP 401 error. Here are the valid operations you can perform with this API using an HTTP request tool:
- Call
GET /loginto get a token (if you don't pass this token to the other methods, you'll get anUnauthorizedstatus returned). This will create a unique session for your application and will populate the session with a few default books. - All other calls need to add the string-based token (with no quotes) as the
Authorizationheader. This is what identifies you to the service. In addition, you should set theAcceptheader toapplication/json. - Call
GETto get a list of the books in your session. This will return a JSON array of books which have the shape:
[
    {
        "isbn":"1025801012",
        "title":"Answers to Absurd Hypothetical Questions",
        "authors":["Randall Munroe"],
        "publishDate":"2014-09-04T00:00:00+00:00",
        "genre":"Nonfiction"
    }
]
- Call
PUT /xxxxto update a book, wherexxxxis the ISBN code for an existing book with the JSON book as the body of the request. - Call
DELETE /xxxxto delete a book, wherexxxxis the ISBN code for the book. - Call
POSTto add a new book, with the JSON book as the body of the request, the ISBN code must be empty. This will return the JSON book with the ISBN code filled in.
Open the starter solution
This exercise utilizes a provided solution. Open the Exercise 2 > Start solution from your copy of the cloned or downloaded course materials in either Visual Studio for Windows or Visual Studio for Mac.
Examine the project structure. It has several projects in the solution.
The BookClient project is the PCL which contains all the code to create and process the UI for the application. You will do all of your work in this project. There are two Page classes in the project, one for the main view which shows a ListView for the books, and a second to add or edit a specific book.
The remaining projects are platform-specific. You will not need to modify any code in these projects; however, you will need to add packages to them and select one as your Startup Project for testing.
Add the NuGet packages
Here you will add the NuGet packages you will need and to make sure the app builds correctly.
- Add the Microsoft HTTP Client Libraries, Microsoft.Net.Http, NuGet package to the BookClient PCL project. It is not necessary to install it in the platform-specific projects.
To add this NuGet package via the Package Manager Console, found in the menu under Tools > NuGet Package Manager > Package Manager Console, run the following command:
Install-Package Microsoft.Net.Http
- Add the Json.NET NuGet package to the BookClient project and to any platform projects you intend to test with (iOS, Android and/or Windows). If you are using Visual Studio on Windows, you can do this at the solution level by right-clicking on the solution node and selecting Manage NuGet Packages for Solution. On Visual Studio for Mac, you will need to add the packages individually to each project through Add > Add Packages....
To add this NuGet package via the Package Manager Console, found in the menu under Tools > NuGet Package Manager > Package Manager Console, run the following command:
Install-Package Newtonsoft.Json
- You should be able to build the application, but do not attempt to run it yet as it has some unimplemented methods which throw exceptions.
- If your project builds correctly then you are done with this part. If not, you could be encountering a bug. When you add Microsoft HTTP Client Libraries to your projects, NuGet will also add dependencies to a few other packages to provide compile-time dependencies against core BCL classes. There is a known problem with certain versions of the NuGet client which causes a build error in the Xamarin.iOS and Xamarin.Android projects when they have a reference to these build packages. The error message will say something similar to:
warning MSB3277: Found conflicts between different versions of the same dependent assembly that could not be resolved. These reference conflicts are listed in the build log when log verbosity is set to detailed.
To resolve this issue, remove the following references from the Xamarin.iOS and Xamarin.Android platform-specific project - leave the package, just delete the references from the References folder. You should be able to build at that point. * System.Runtime * System.IO * System.Threading.Tasks
For more information on this error, see this MSDN blog post.
Examine the Book and BookManager classes
The service works with a set of books described in JSON. We've added a JSON parser (Json.NET), and have some code in the project for the object representation of the book.
- Expand the Data folder. You will find two files inside.
| Source File | Description |
|---|---|
| Book.cs | This is the object representation for a single book. The definition should match the JSON description above. It has public properties defined for each of the passed fields. Json.NET is smart enough to manage camel-casing vs. pascal-casing so you can name the properties with standard C# conventions, the key thing is that the names are spelled correctly. |
| BookManager.cs | This is the manager class which wraps the web service. It has stubbed out methods (with NotImplementedException code) for each of the operations you need to implement. The UI already has code in place to call each of these methods. |
Login to the service
The service requires you "login" first to get a token. There is no user authentication (i.e. you do not have to enter any credentials); however, you must call a specific endpoint first to get a token. You must then send the token back to the server on each subsequent request in the HTTP header.
- In the Data folder, open BookManager.cs.
- Add the following field to your code. This is the base address of the service.
const string Url = "http://xam150.azurewebsites.net/api/books/";
- Add the following field to hold the token.
private string authorizationKey;
- Create a
privatemethod namedGetClientwhich returns aTask<HttpClient>.
private async Task<HttpClient> GetClient()
{
   ...
}
-
In the method, create a new
HttpClient. -
If this is the first time the method has been called, then the
authorizationKeyfield will not be set. In this case, you need to useGetStringAsyncwith the base URL +loginto get the token. -
The returned token will have quotes around it which need to be removed. An easy way to do this is to use
JsonConvert.DeserializeObject<string>(...). Save the result into theauthorizationKeyfield. -
Add an
Authorizationheader to theDefaultRequestHeaderscollection of theHttpClient. Use the token as the value. -
Add an
Acceptheader to theDefaultRequestHeaderscollection of theHttpClient. Useapplication/jsonas the value. -
Return the
HttpClientobject from the method.
private async Task<HttpClient> GetClient()
{
    HttpClient client = new HttpClient();
    if (string.IsNullOrEmpty(authorizationKey))
    {
        authorizationKey = await client.GetStringAsync(Url + "login");
        authorizationKey = JsonConvert.DeserializeObject<string>(authorizationKey);
    }

    client.DefaultRequestHeaders.Add("Authorization", authorizationKey);
    client.DefaultRequestHeaders.Add("Accept", "application/json");
    return client;
}
Perform a GET operation
Now that we can authenticate to the service, let's add our code to retrieve the books from the base Url.
- In the BookManager.cs file, find the method named
GetAllwhich returns aTask<IEnumerable<Book>>. - Use your
GetClientmethod to retrieve anHttpClientto work with. - Use
GetStringAsyncon the base Url to retrieve the array of books. You can use the C#async/awaitfeature to make this easy to consume - make sure you add theasynckeyword to the method definition. - Pass the returned string into
JsonConvert.DeserializeObjectto turn the JSON data into an object graph and return it back to the caller.
public class BookManager
{
    ...
    public async Task<IEnumerable<Book>> GetAll()
    {
        HttpClient client = await GetClient();
        string result = await client.GetStringAsync(Url);
        return JsonConvert.DeserializeObject<IEnumerable<Book>>(result);
    }
}
- Run the application and press the Refresh icon in the toolbar (at the top or bottom depending on the platform, but the icon looks like a pair of arrows in a circle).
- After a few seconds, the app should load a set of existing books and display them. Debug through the application if you do not see the data get loaded. Verify it is properly calling
Loginand then passing the authorization token into theGETcall to retrieve the books.
Perform a POST (add) operation
We are now displaying the books, let's add support to add a new book using POST.
- Open the
BookManagercode and locate the method namedAddwhich takes a title, author and genre and returns aTask<Book>. -
In the method, create a new
Bookobject and populate the fields with the passed data:- Set the
ISBNfield to an empty string. - Make sure to create a new
Listto hold the passed author (we only allow a single author here for simplicity, but you could expand this code if you like to allow for multiples using a comma separator or some other convention). - Set the
PublishDatetoDateTime.Now.
- Set the
-
Get a client from your
GetClientmethod. -
Use the
PostAsyncmethod against the base URL to add the book.- You will need to turn the
Bookobject into JSON usingJsonConvert.SerializeObject. - Create the
HttpContentfrom the JSON string by creating a newStringContentobject, use the constructor which also takes an encoding and media type. - The encoding should be
Encoding.UTF8and the media type should beapplication/json.
- You will need to turn the
-
The response from POST will be a JSON string represent the returned book. Deserialize it to a
Bookobject and return theBookinstance from the method.
public async Task<Book> Add(string title, string author, string genre)
{
    Book book = new Book() {
        Title = title,
        Authors = new List<string>(new[] { author }),
        ISBN = string.Empty,
        Genre = genre,
        PublishDate = DateTime.Now.Date,
    };

    HttpClient client = await GetClient();
    var response = await client.PostAsync(Url,
        new StringContent(
            JsonConvert.SerializeObject(book),
            Encoding.UTF8, "application/json"));

    return JsonConvert.DeserializeObject<Book>(
        await response.Content.ReadAsStringAsync());
}
- Build and run the application. Press the Add button ([+]). When you press the add button, it will add the book and return to the main screen.
Perform a PUT (update) operation
We are now able to display and add new books. Here you add the code necessary to update an existing book.
- Open the
BookManagerclass and locate the method namedUpdatewhich takes aBookand returns aTask. -
In the method implementation, get a new client and use the
PutAsyncmethod to send a JSON-encoded book to the base URL with the ISBN added to it.- So, if the ISBN is
12345678, then the URL would beapi/books/12345678.
- So, if the ISBN is
- You can use the same code to create the message body that you did when adding a book - but in this case we know where to put the book since it already has an assigned ISBN. Make sure to set the encoding and content-type as you did before.
- In this case, we don't have an explicit return type - but we want to return
Taskso that exceptions are properly returned back to the caller, and so the caller can use theawaitkeyword to pause the progress of the method until the asynchronous method is finished. - Try out the logic by running the application and tapping on an existing book to edit it.
public async Task Update(Book book)
{
    HttpClient client = await GetClient();
    await client.PutAsync(Url + book.ISBN,
        new StringContent(
            JsonConvert.SerializeObject(book),
            Encoding.UTF8, "application/json"));
}
Perform a DELETE operation
The final operation (and easiest) we have is DELETE.
- Open the
BookManagerclass and locate theDeletemethod which takes a string ISBN and returns aTask. - In the method body, get a new client and use the
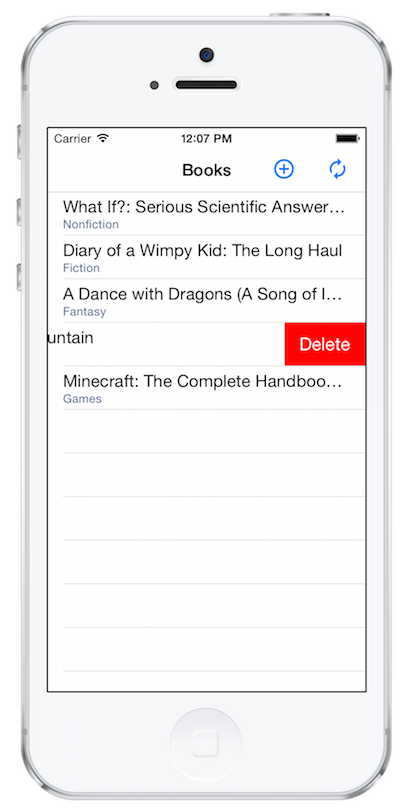
DeleteAsyncmethod against the base URL + the ISBN (just like the UPDATE case). - Run the application to test the delete logic - you can get to the functionality by swiping to the left on iOS, or by performing a long-click on Android and Windows (press + hold).
public async Task Delete(string isbn)
{
    HttpClient client = await GetClient();
    await client.DeleteAsync(Url + isbn);
}
Exercise summary
You have successfully utilized a REST service within your Xamarin application. As a fun side exercise, try adding an ActivityIndicator to the UI while you are loading the books. The completed solution has this code implemented through a Binding to the Page.IsBusy property if you'd like to just examine one way to accomplish this.
You can view the completed solution in the Exercise 2 > Completed folder of your copy of the cloned or downloaded course materials.