Exercise 2: Creating Xamarin.Forms Phoneword
The goal of this exercise is to create a new Xamarin.Forms application which displays a UI to translate an alphanumeric phone number to a numeric number and place a call. The UI will consist of a: Label, an Entry, and two Button controls.
Our steps for this exercise will be broken into two sections:
- Create the UI
- Add the behavior
When we are done, the application will look similar to the images shown below:

To complete the exercise, you will need Visual Studio for Windows or macOS with the Xamarin development tools installed. You will also need either an emulator/simulator or a device to run the exercise on. Please see the setup page if you need help installing the Xamarin development environment.
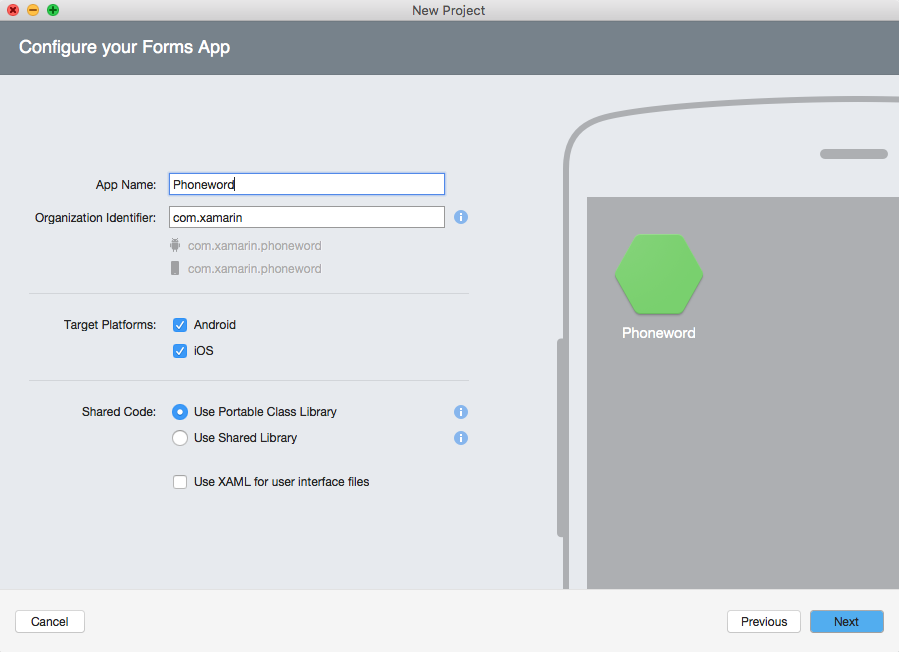
Create the Phoneword project
Open Visual Studio and create a New Solution. This will open the New Project wizard in Visual Studio which has a few screens you need to fill in.
- Create a new solution. Select the Blank Forms App project type in the Multiplatform category.
- Name the app Phoneword.
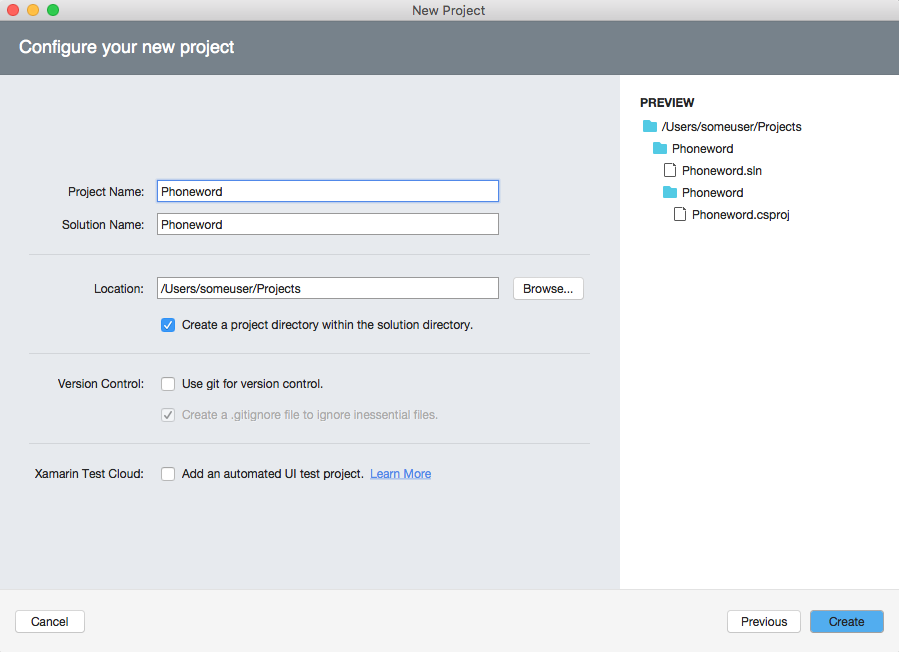
-
Check the Use Portable Class Library box in the Shared Code section.
- Note: You can also choose "Use Shared Library" - generally everything here will work, and the platform-specific code could be implemented differently in that project type.
- Uncheck the Use XAML for user interface files checkbox. We will create the UI in code.
- Create a new solution. Select Mobile App (Xamarin.Forms) under Visual C# > Cross-Platform.
- Name the app Phoneword.
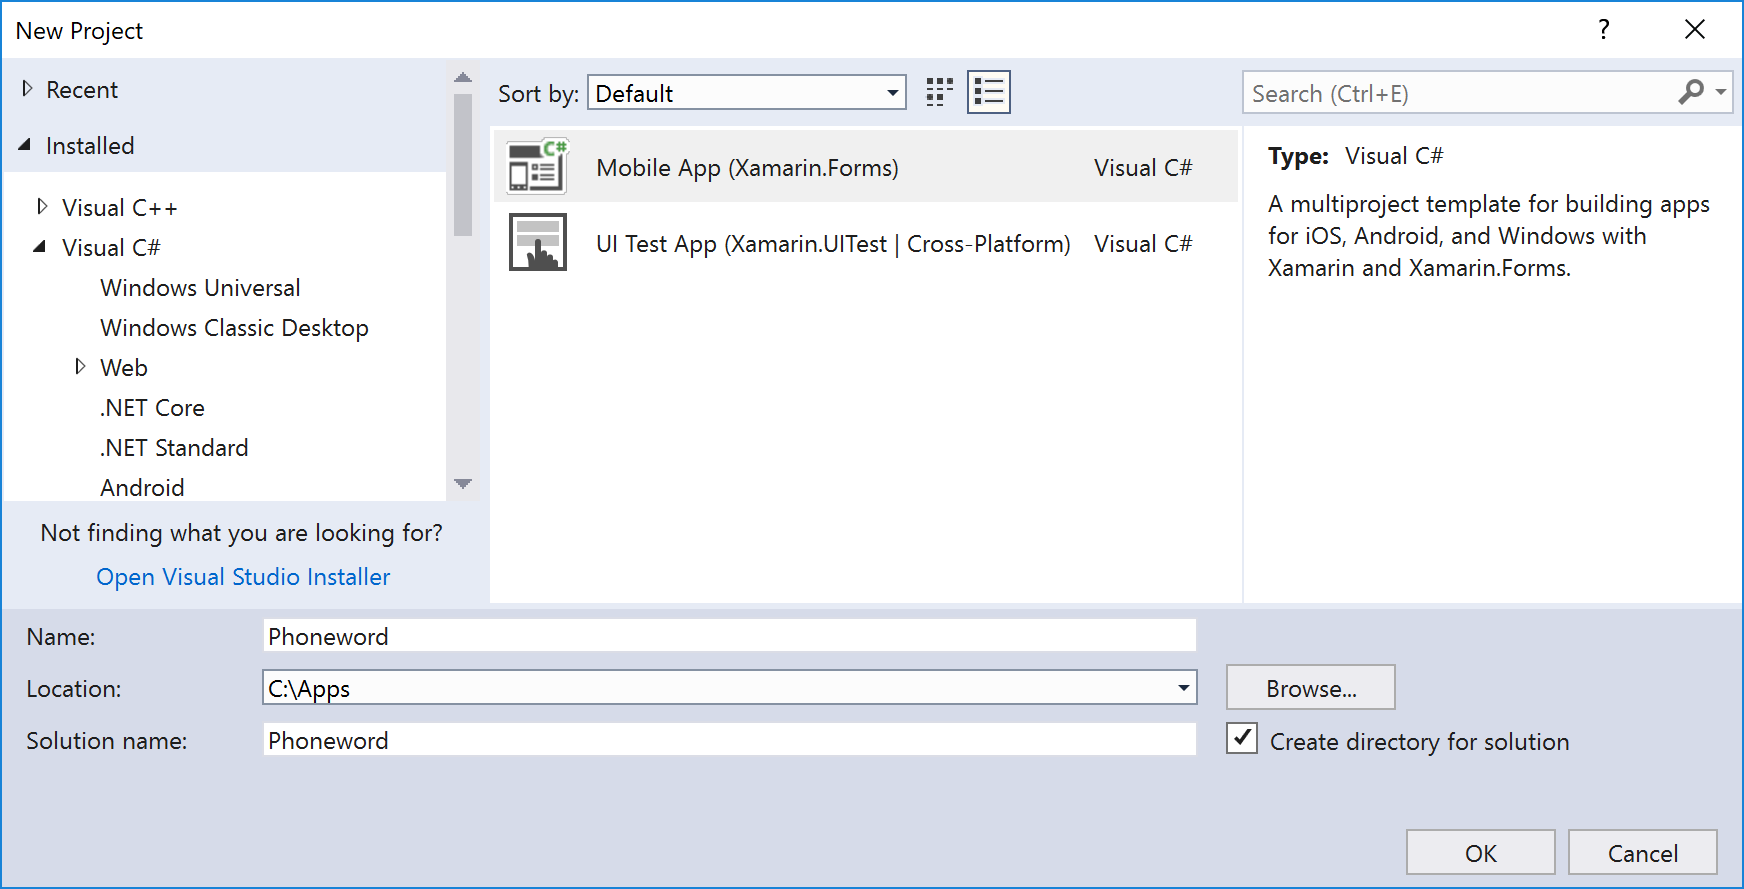
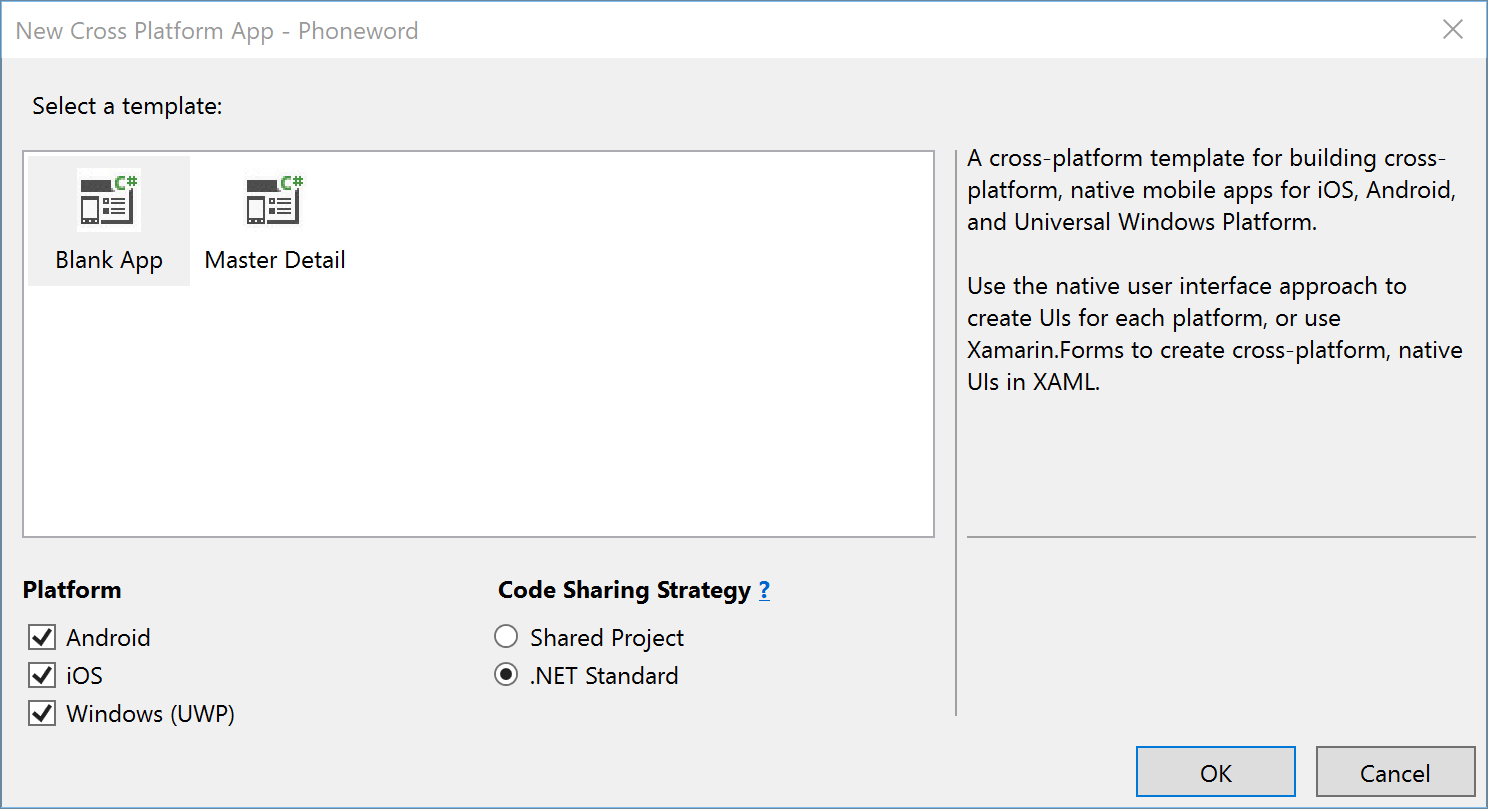
- Select the Blank App to create an app with a XAML-based UI.
- Check Xamarin.Forms for the UI Technology.
- Select .NET Standard from the Code Sharing Strategy choice to put shared code in a compiled library.
Note: You can also choose Shared Project - generally everything here will work, and the platform-specific code could be implemented differently in that project type.
- Click OK to create your solution.
Add a new C# source file
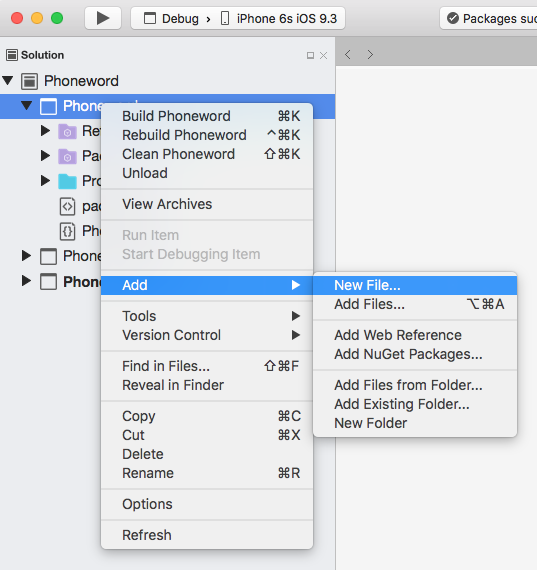
- Right-click on the PCL project named Phoneword and select Add > New File....
- Select Empty File under General to add a blank C# file to the application.
- Name the file PhonewordTranslator.cs.
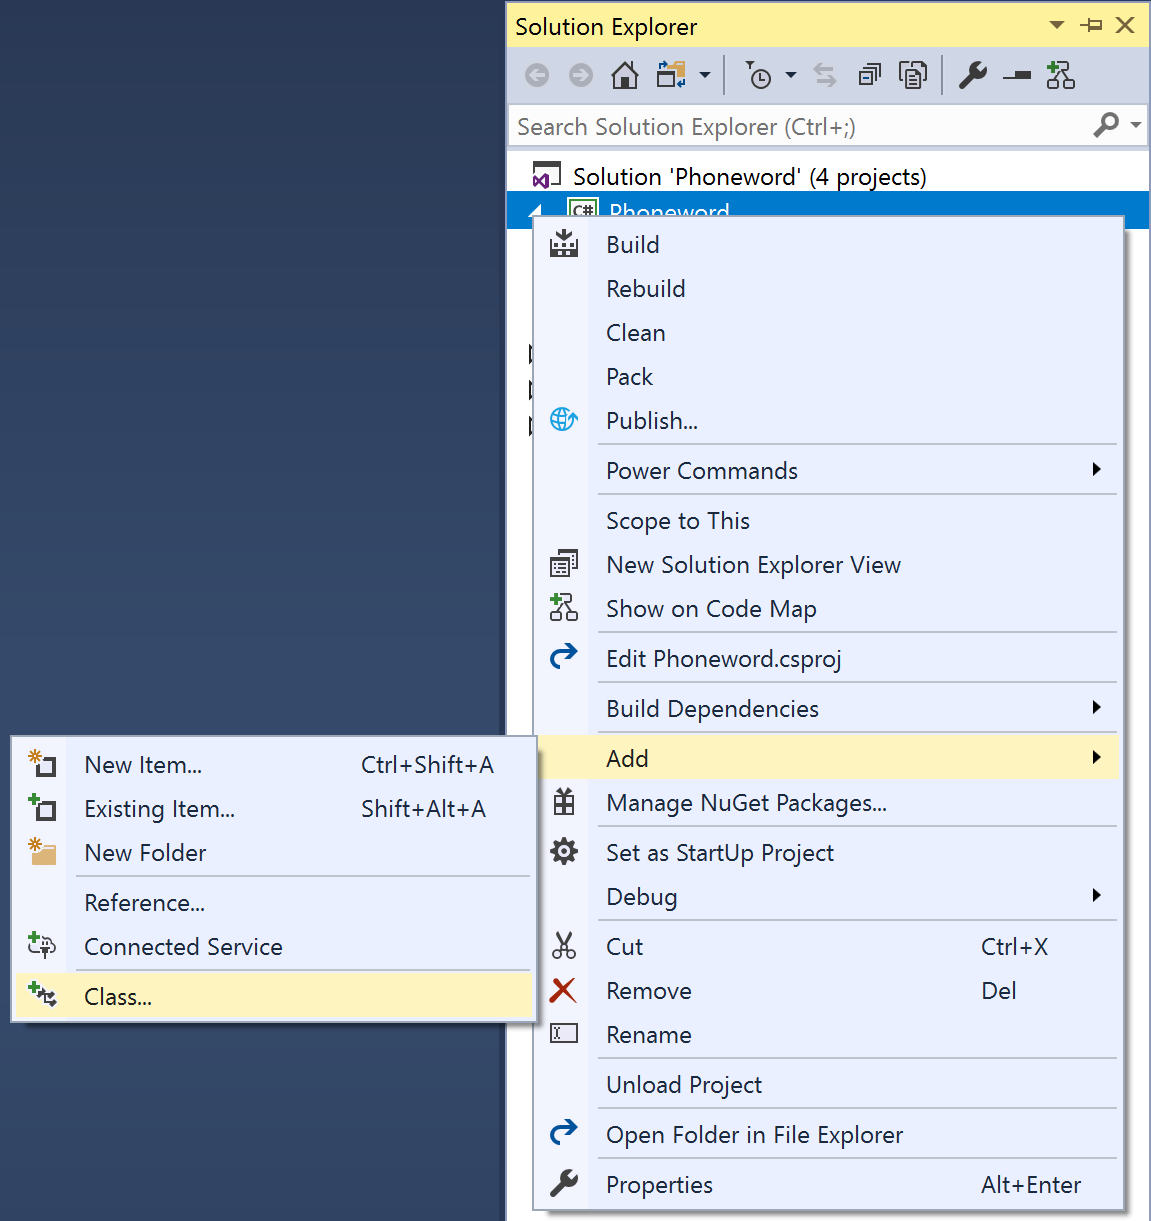
- Right-click on the .NET Standard project named Phoneword and select Add > Class.... (This will preselect the Visual C# > Class item template.)
- Name the file PhonewordTranslator.cs.
Add the translation logic
Place the following code into the new PhonewordTranslator.cs source file:
using System.Text;

namespace Core
{
    public static class PhonewordTranslator
    {
        public static string ToNumber(string raw)
        {
            if (string.IsNullOrWhiteSpace(raw))
                return null;

            raw = raw.ToUpperInvariant();

            var newNumber = new StringBuilder();
            foreach (var c in raw)
            {
                if (" -0123456789".Contains(c))
                    newNumber.Append(c);
                else
                {
                    var result = TranslateToNumber(c);
                    if (result != null)
                        newNumber.Append(result);
                    // Bad character?
                    else
                        return null;
                }
            }
            return newNumber.ToString();
        }

        static bool Contains(this string keyString, char c)
        {
            return keyString.IndexOf(c) >= 0;
        }

        static readonly string[] digits = {
            "ABC", "DEF", "GHI", "JKL", "MNO", "PQRS", "TUV", "WXYZ"
        };

        static int? TranslateToNumber(char c)
        {
            for (int i = 0; i < digits.Length; i++)
            {
                if (digits[i].Contains(c))
                    return 2 + i;
            }
            return null;
        }
    }
}
Examine the code:
It has a single public static method, which you will be using to translate the number from alphanumeric text into a regular numeric phone number.
Restructure the boilerplate code
Next, let's make the code a bit more maintainable by restructuring the shared code.
- We'll be creating our own code-based UI, so delete the existing MainPage.xaml and MainPage.xaml.cs files from the project.
- Create a new class in a new file named MainPage that derives from
ContentPage.
- Create a new class in a new file named MainPage that derives from
ContentPage.
- Define a UI programmatically in MainPage's constructor by creating a
StackLayoutthat contains aLabeland assigning it to theContentproperty. - You will need to add a
using Xamarin.Formsstatement sinceContentPageis in theXamarin.Formsnamespace.
using Xamarin.Forms;
...
public class MainPage : ContentPage
{
    public MainPage()
    {
        Content = new StackLayout
        {
            VerticalOptions = LayoutOptions.Center,
            Children = {
                new Label {
                    HorizontalTextAlignment = TextAlignment.Center,
                    Text = "Welcome to Xamarin.Forms!"
                }
            }
        };
    }
    ...
}
- Open the
Applicationclass in the shared library that was created with the project. This is the class that is responsible for presenting the initial UI. It will either be in a source file named App.xaml.cs or App.cs depending on the IDE and template you are using. - In the
Applicationclass (app.cs or app.xaml.cs), change the constructor to instantiate your newMainPageclass and assign it to theMainPageproperty.
public class App : Application
{
    public App()
    {
        // The root page of your application
        MainPage = new MainPage();
    }
    ...
}
Run the application
Run the application and verify the UI displays correctly.


Create the UI for Phoneword
Next, we need to describe the user interface for Phoneword. Remember, we are using controls defined in Xamarin.Forms which will then be rendered with native implementations in each project.
- Open MainPage.cs.
- Create a
StackLayout. -
Create the required controls for the Phoneword UI:
- A
Labelwith theTextproperty set to "Enter a Phoneword:". This will prompt the user to input the phone number they would like translated. - An
Entrythat will allow the user to edit the phone number which is used to collect the input from the user. It should be initialized with theText"1-855-XAMARIN". The user will be able to replace the initial text with their own; however, pre-populating it with a phoneword will be convenient for testing. - A
Buttonthat will run the logic to translate the phone number. ItsTextproperty should be set to "Translate". - A second
Buttondisplaying theText"Call", which will place the call. ThisButtonshould be initially disabled (hint: use theIsEnabledproperty). - Store the
Entryand the twoButtoncontrols in class fields so you can interact with them later.
- A
- Add the controls to the
StackLayout. - Assign the
StackLayoutto MainPage'sContentproperty.
public partial class MainPage : ContentPage
{
   Entry phoneNumberText;
   Button translateButton;
   Button callButton;

   public MainPage()
   {
        this.Padding = new Thickness(20, 20, 20, 20);

        StackLayout panel = new StackLayout
        {
            Spacing = 15
        };

        panel.Children.Add(new Label {
            Text = "Enter a Phoneword:",
            FontSize = Device.GetNamedSize(NamedSize.Large, typeof(Label))
        });

        panel.Children.Add(phoneNumberText = new Entry {
            Text = "1-855-XAMARIN",
        });

        panel.Children.Add(translateButton = new Button {
            Text = "Translate"
        });

        panel.Children.Add(callButton = new Button {
            Text = "Call",
            IsEnabled = false,
        });

        this.Content = panel;
    }
}
Respond to button taps
Subscribe a handler to the Clicked event of the Translate button. Use a named method named OnTranslate that takes an object and an EventArgs as parameters.
Your handler should translate the entered value using the PhonewordTranslator.ToNumber method and store the result in a field named translatedNumber.
Here are some additional hints for the code:
- Retrieve the phone number from the
Textproperty of theEntrycontrol. - The
PhonewordTranslatorclass is in theCorenamespace. - The
PhonewordTranslator.ToNumbermethod returnsnullif the number could not be translated.
public class MainPage : ContentPage
{
    ...
    string translatedNumber;

    public MainPage()
    {
        ...
        translateButton.Clicked += OnTranslate;
        this.Content = panel;
    }

    private void OnTranslate(object sender, EventArgs e)
    {
        string enteredNumber = phoneNumberText.Text;
        translatedNumber = Core.PhonewordTranslator.ToNumber(enteredNumber);

        if (!string.IsNullOrEmpty(translatedNumber))
        {
            // TODO:
        }
        else
        {
            // TODO:
        }
    }
}
Update the UI
Next, let's add some logic to change the Text of the Call Button to include the phone number when it is successfully translated. You can use the value you stored in the translatedNumber field. In addition, enable and disable the button based on the successful translation - e.g. if TranslateNumber returned null, disable the button, but if it was successful, enable it.
- Use the
IsEnabledproperty to enable and disable the button. - Make sure to reset the
Titleof the Call Button if the number translation fails - e.g. remove the phone number.
private void OnTranslate(object sender, EventArgs e)
{
    string enteredNumber = phoneNumberText.Text;
    translatedNumber = Core.PhonewordTranslator.ToNumber(enteredNumber);
    if (!string.IsNullOrEmpty(translatedNumber))
    {
        callButton.IsEnabled = true;
        callButton.Text = "Call " + translatedNumber;
    }
    else
    {
        callButton.IsEnabled = false;
        callButton.Text = "Call";
    }
}
Run the application
- Build and run the application. The application will show a disabled Call Button.
- Select the Translate button and verify that the Call button text changes to "Call 1-855-9262746" and the Call button is enabled.
- Change the phone number in the text field. On iOS the in-screen keyboard displays automatically. This behavior is built into Xamarin.Forms and makes the keyboard experience consistent across the platforms.
- Run the app on at least one additional platform. Notice the UI is consistant but looks appropriate for each platform while providing the same behavior.
Exercise summary
In this exercise, you have added a custom UI to your application using pages and views.
You can view the completed solution in the Exercise 2 > Completed folder of your copy of the cloned or downloaded course materials.