Exercise 1: Creating your first Xamarin.Forms application
The primary goal of this exercise is to create a new Xamarin.Forms application using the project templates in Visual Studio on macOS or Windows. We will then walk through the project and explore all the parts. Our secondary goal is to explore how to share code between platform-specific projects.
To complete the exercise, you will need Visual Studio for Windows or macOS with the Xamarin development tools installed. You will also need either an emulator/simulator or a device to run the exercise on. Please see the setup page if you need help installing the Xamarin development environment.
Create a new project
Open Visual Studio and create a New Solution. This will open the New Project wizard in Visual Studio which has a few screens you need to fill in.
- In the New Project wizard, select Visual C# > Cross-Platform > Mobile App (Xamarin.Forms).
- Name the project FirstApp and click OK to continue.

- Select the Blank App to create an app with a XAML-based UI.
- Select .NET Standard from the Code Sharing Strategy choice to put shared code in a compiled library.
- Click OK to create your solution.

- On Windows, the template will also create a UWP project. Sometimes, UWP requires you choose a minimum and target platform version. For this exercise, use the default selections.

Open Visual Studio for Mac and create a File > New Solution. This will open the New Project wizard.
Select the Xamarin.Forms Template
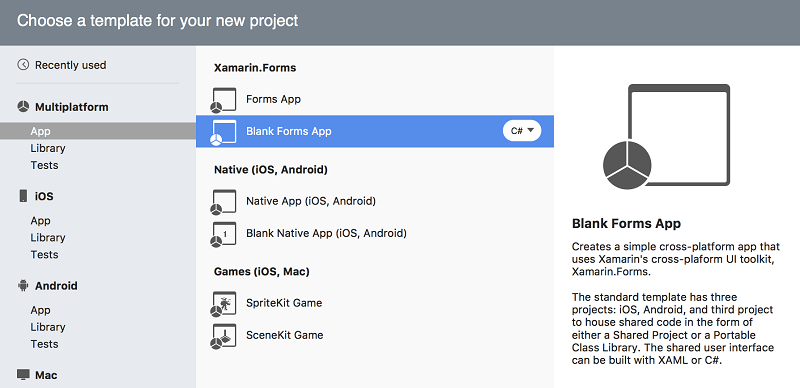
In the New Project wizard, select Multiplatform > App > Blanks Forms App and click Next to continue.
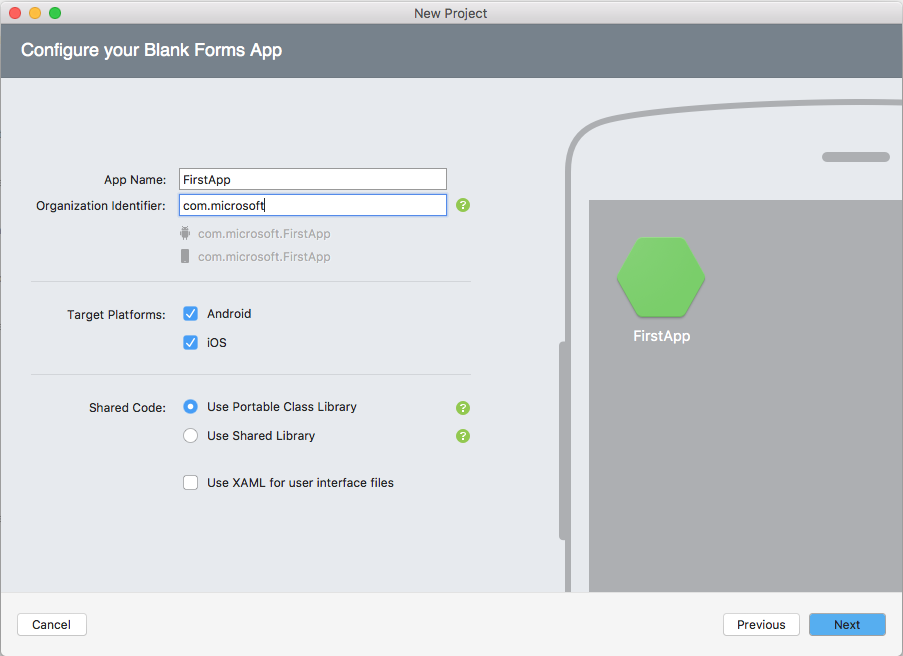
Configure the application
- Name the application FirstApp.
- Leave the Organization identifier as the default value.
- Select Android and iOS for the Target Platforms.
- Select the Portable Class Library under Shared Code.
- Make sure the Use XAML for user interface files is unchecked, this will generate code-based UI.
- Click Next.
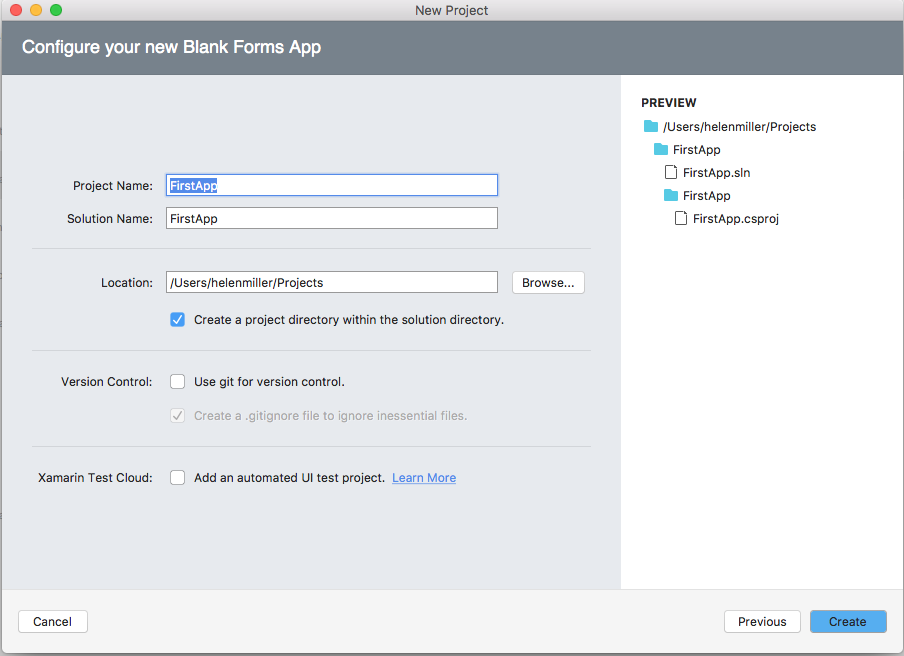
Create the application
Leave all options as their defaults on the final screen and click Create to create the application.
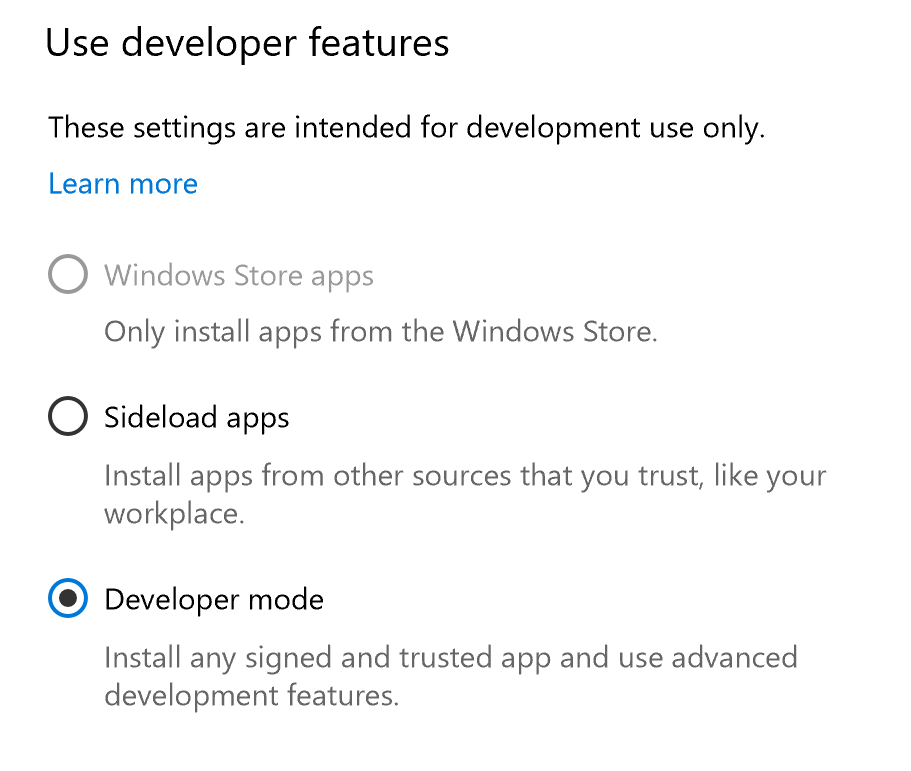
Enable developer mode for UWP
Note: With Visual Studio for Mac, this step is not required.
If you haven't done so already, Windows will prompt you to enable developer mode. Developer mode will allow you to deploy and run your unsigned development UWP apps on your local Windows machine.
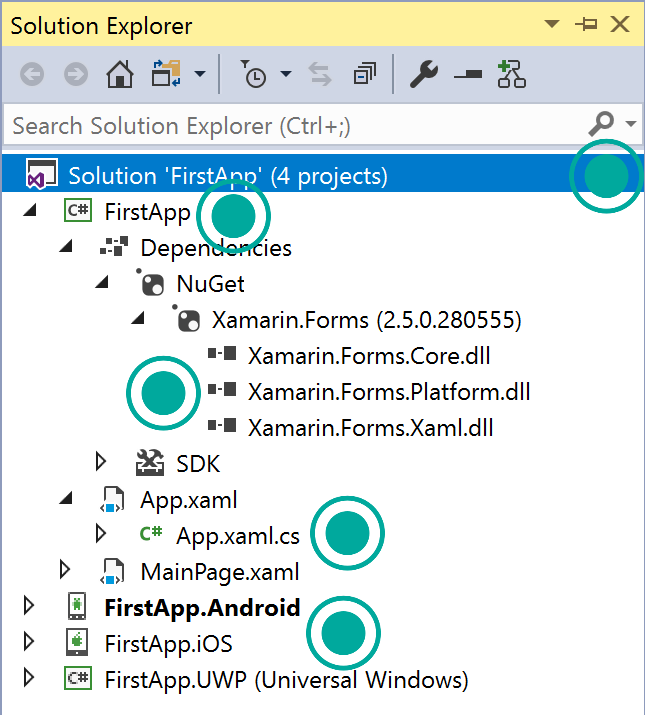
Examine the solution structure
Explore the Xamarin.Forms solution below; hover over each item to learn its purpose within a Xamarin.Forms app.

Replace the default XAML-based UI
The Xamarin.Forms templates may create a default UI in XAML. For the purposes of this class, we're going to define our UI programmatically.
- If you have an App.xaml file, follow along to switch it to a programmatically generated UI. If not, you can skip ahead to the next section.
-
Open the
Applicationclass in the shared App.xaml.cs. Inside App.xaml.cs swap out the existingApp()constructor for this code-based UI constructor.
public App()
{
    // The root page of your application
    MainPage = new ContentPage {
        Content = new StackLayout {
            VerticalOptions = LayoutOptions.Center,
            Children = {
                new Label {
                    HorizontalTextAlignment = TextAlignment.Center,
                    Text = "Welcome to Xamarin Forms!"
                }
            }
        }
    };
}
This will display a Label within a StackLayout as the UI for MainPage. The Label is defined with its Text property set to "Welcome to Xamarin.Forms!". This Label and its contents will be visible when the application is running.
Optionally, you can delete MainPage.xaml and MainPage.xaml.cs from your project. This isn't required, but these files won't be needed.
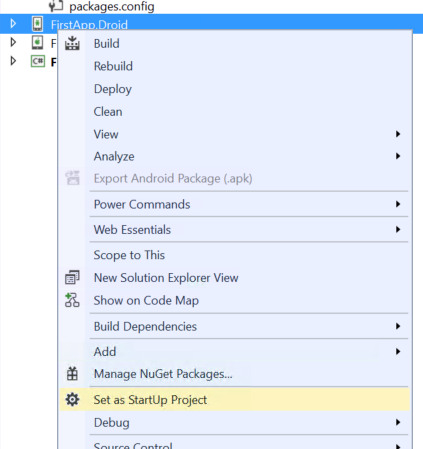
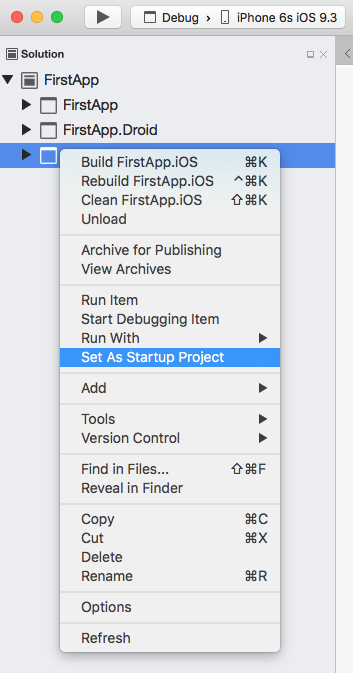
Select a startup project
- Select the project you want run or debug in the solution explorer, right-click on the project title and click Set as Startup Project. Remember, you cannot execute the shared compiled project directly, you must choose one of the platform specific projects.
Depending on which platform you run on, the build type (Debug+iPhoneSimulator, Debug+ARM, Debug+AnyCPU, etc.) may restrict the places you can deploy to, and even the projects which are built. If you have trouble setting a project as active, or you get deployment errors, check the build type and the solution configuration to see which projects are being built. It can be very helpful to setup a common Debug build type which builds all platforms for how you are debugging - this is not present in the generated templates. See this blog post for an example of this.
Run the application
- Run the application on a device or in a simulator / emulator by clicking the Play icon in the toolbar. This will build, deploy, and run the application on the selected device or emulator.
It should display a single piece of text, centered on the screen as shown here:


If you have trouble setting a project as active, or you get deployment errors; check the build type and the solution configuration to see which projects are being built. It can be very helpful to setup a common Debug build type which builds all platforms for how you are debugging - this is not present in the generated templates. See this blog post for an example of this.
Explore the architecture
-
Open the shared application class implementation and add a Button to the UI - here's an example to guide you:
public App() { // The root page of your application var layout = new StackLayout { VerticalOptions = LayoutOptions.Center, Children = { new Label { HorizontalTextAlignment = TextAlignment.Center, Text = "Welcome to Xamarin Forms!" } } }; MainPage = new ContentPage { Content = layout }; Button button = new Button { Text = "Click Me" }; button.Clicked += async (s, e) => { await MainPage.DisplayAlert("Alert", "You clicked me", "OK"); }; layout.Children.Add(button); } - Run the application - you should now see a button in the UI, just under the label.
- Tap the button to generate a UI message.
- Place a breakpoint in the button clicked handler and tap the button again. While the debugger is stopped, examine the call stack. For Android, at the bottom of the call stack you should find native handlers, they will clearly come from java.widgets, in UWP, you will see a XAML button and in iOS you will see some native iOS code methods. This is bubbled up through a view renderer that translates the platform-agnostic
Buttontype we created into a native, platform-specific button.
Exercise summary
In this exercise, you have created your first Xamarin.Forms application and run it on a simulator/emulator or device!
You can view the completed solution in the Exercise 1 > Completed folder of your copy of the cloned or downloaded course materials.