Duration
~10 minutes
Goals
The primary goal of this lab will be to explore the different UITableViewCell styles that are included in iOS. This is a group exercise intended to be done with an instructor.
Required assets
There is a completed solution in the Exercise 3 folder. In addition, if you did not complete the prior exercise, you can use the completed solution from that exercise as a starting point here.
Challenge
You will be continuing from the prior exercise, working with an instructor to modify your GetCell implementation (in either Table View) to try out the built-in cell styles through the UITableViewCell constructor.
Depending on the style you are working with, you will need to fill in different subview values. Here are the properties from the EmailItem that will be used in the lab:
- Subject will be mapped to
TextLabel.Text. - Body will be mapped to
DetailTextLabel.Text. - GetImage() will be used to create an image for
ImageView.Image.
Steps
Below are the step-by-step instructions to implement the exercise. You only need to work with a single version of your Table View. We have two in this project and either one can be used. The lab instructions here will assume you are continuing with the code-based approach that utilizes the UITableViewSource.
The Default style
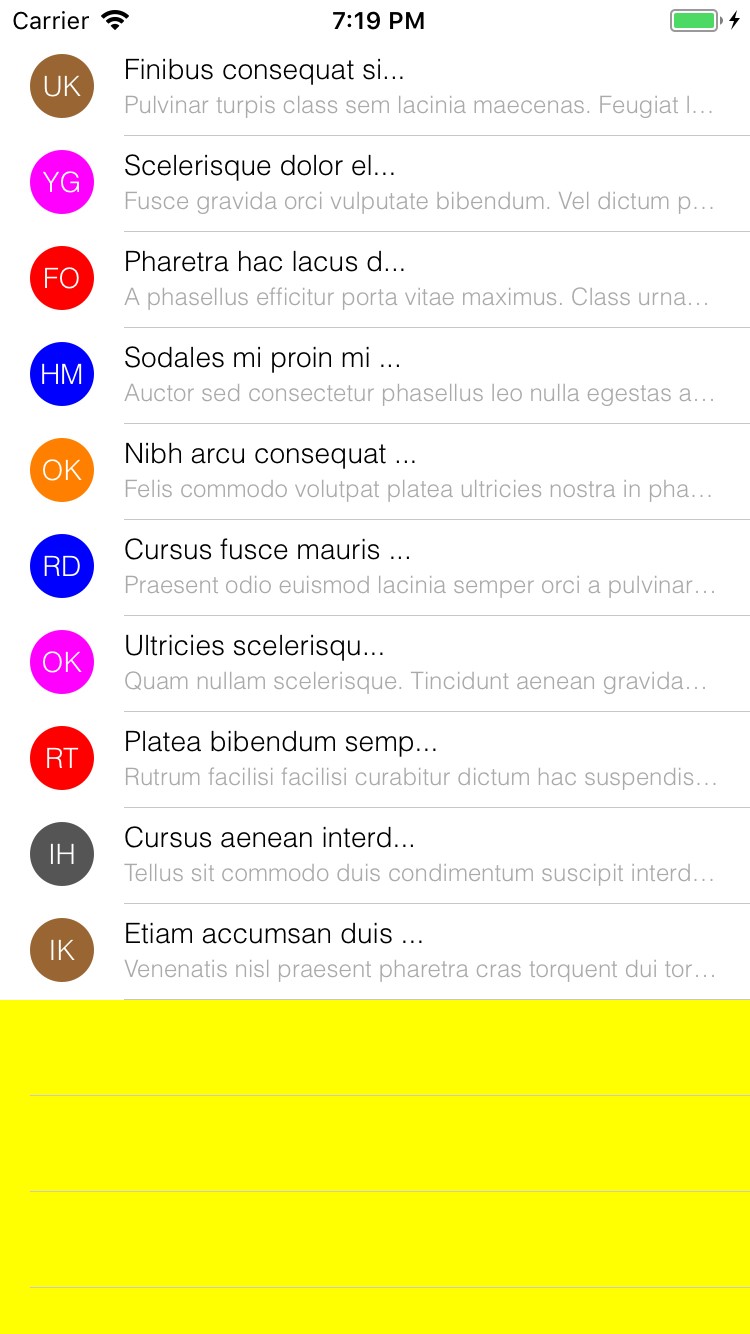
We've already been using the Default style, however we haven't set all the fields.
-
Open the source file for your
EmailServerDataSourceclass (or the Table View Controller implementation, either will work) and locate theGetCellmethod. All our changes will happen here. -
Let's officially use the default style - change the constructor for the
UITableViewCellto use the version that takes aUITableViewCellStyleand astring.- Set the style the Default
- Pass
nullin for the string parameter. We'll use this later.
- Run the app to see that everything is the same.
-
Next, set the cell's
ImageView.Imageproperty to the result from theEmailItem.GetImage()method. This will create a rounded "initials" image indicating who the email is from. You can look at the code in theEmailServerclass if you are interested in CoreGraphics and how this was done. - Run the app again to see the results.
The Subtitle style
Next, let's try the Subtitle style. This style includes a second piece of text we can add to the screen.
- Change the cell style to Subtitle instead of Default.
-
Fill in the
DetailTextLabel.Textproperty with theEmailItem.Bodyproperty. - Run the app to see the results.
-
This is probably the most common style used as it presents a reasonable amount of information. Let's customize it a bit to see what options are available.
- Set the
Fontproperty for theTextLabelto beUIFont.FromName("Helvetica Light", 14). - Set the
Fontproperty for theDetailTextLabelto beUIFont.FromName("Helvetica Light", 12). - Set the
TextColorproperty for theDetailTextLabelto beUIColor.LightGray.
- Set the
- Run the app to see the results.
The Value1 style
Next, let's try the Value1 cell style. This style has the same features as Subtitle but places the text in different places.
- Change the cell style to Value1.
- Run the app to see the change. What happened to our detail text?
- The problem is that the two text controls now share the same line. Our main text is too long so the detail text is pushed out of view.
This is a common problem with this style. We'll solve this in another course when we talk about custom cells; for now, just clip the text
to 20 characters using
Substring.
cell.TextLabel.Text = item.Subject.Substring(0, Math.Min(20, item.Subject.Length)) + "...";
The Value2 style
Finally, let's try the Value2 cell style.
- Change the cell style to Value2.
- Run the app to see the change. What happened?
- You should have gotten a runtime exception - something like this:
- Value2 is the only style that does not include an image. Fix the problem by commenting out the image assignment.
- Run the app to see the results.
- Reset the app to use the Subtitle style and uncomment the image assignment to prepare for the next exercise.

Summary
In this exercise, you tried out each of the basic cell styles. The supplied Completed project has the updated code in both the Storyboard and code-based ViewControllers.