Exercise 3: Add behavior to the UI
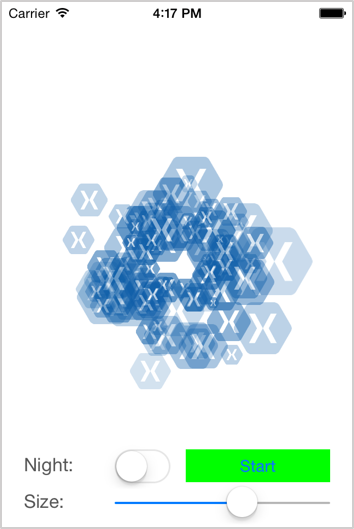
The primary goal of this lab is to add behavior to your views using the View Controller's code behind. The finished UI should look something like this:
To complete the exercise, you will need Visual Studio for Windows or macOS with the Xamarin development tools installed. You will also need either an emulator/simulator or a device to run the exercise on. Please see the setup page if you need help installing the Xamarin development environment.
Open the starter solution
This exercise is a continuation of the previous exercise. You can use your existing solution or begin from the prior Exercise 2 > Completed solution in your copy of the cloned or downloaded course materials.
Add logic and resources
We're going to display "fireworks" in our application. To save time, we will use a provided particle generator class file from the Exercise 3 > Assets folder of your copy of the cloned or downloaded course materials to create our fireworks.
- Add the SimpleParticleGen.cs file to your fireworks project.
- Add the three (3) xamlogo png files to your project's Resources folder.
Utilize the resources
- Open ViewController.cs and add a class level reference to the SimpleParticleGen class you just added named fireworks.
- In the
ViewDidLoadmethod, instantiate thefireworksparticle generator. For the first argument use theUIImage.FromFilemethod to load xamlogo.png, the second argument should be the View Controller's View (this.View).
public partial class ViewController : UIViewController
{
    SimpleParticleGen fireworks;
    ...
    public override void ViewDidLoad ()
   {
      base.ViewDidLoad ();

     fireworks = new SimpleParticleGen (UIImage.FromFile ("xamlogo.png"), View);
    }
Assign names to controls
In order to interact with our controls programmatically, we'll need a reference usable in the view controller's code.This reference is provided automatically when you name the control in the Designer.
- Open Main.storyboard.
- Select the switch.
- In properties pane, set the switch's name to switchNight.
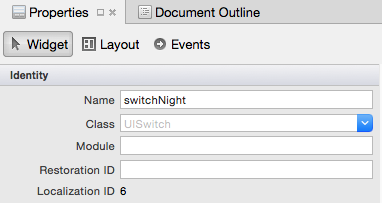
- Set the switch's default state to off in the Properties pane in the Switch section, uncheck State.
- Set the button's name to buttonStart.
- Set the slider's name to sliderSize.
- Open ViewController.designer.cs and inspect the generated outlets.
[Outlet]
[GeneratedCode ("iOS Designer", "1.0")]
UIButton buttonStart { get; set; }

[Outlet]
[GeneratedCode ("iOS Designer", "1.0")]
UISlider sliderSize { get; set; }

[Outlet]
[GeneratedCode ("iOS Designer", "1.0")]
UISwitch switchNight { get; set; }
Add behavior to the button
Now that we've named the button, we can access it from the View Controller's code behind to show the fireworks.
- Open ViewController.cs.
- In the
ViewDidLoadmethod, add a delegate to call the particle generator firework'sStartmethod when the button is clicked. Remember, we use theTouchUpInsideEventHandler. - Run the application and press the Start button.
public override void ViewDidLoad ()
{
   ...
   buttonStart.TouchUpInside += delegate(object sender, EventArgs e)
   {
      fireworks.Start();
   };
}
Add behavior to the switch
We can also use the designer to help us wire up events for UIKit controls.
- Open Main.storyboard and select the switch by single clicking on the control on the design surface.
- In the Properties pane, select the Events section.
- In the Value section, type in a method handler name for Changed: SwitchNight_ValueChanged and press return.
- Open ViewController.cs and create a partial void method that accepts a UISwitch with the same name: SwitchNight_ValueChanged. Autocomplete should recognize the method name and complete the signature.
- Inspect ViewController.designer.cs. You should see a new partial method
SwitchNight_ValueChanged. - We can determine the switch's state by checking its boolean
Onproperty. If the switch is on, set the View Controller's background color to a dark color, otherwise set it to white.
- Select a location for the new event handler method in ViewController.cs.
- Inspect ViewController.designer.cs. You should see a new partial method
SwitchNight_ValueChanged. - We can determine the switch's state by checking its boolean
Onproperty. If the switch is on, set the View Controller's background color to a dark color, otherwise set it to white.
partial void SwitchNight_ValueChanged (UISwitch sender)
{
   if(switchNight.On)
      this.View.BackgroundColor = UIColor.FromRGB(25,25,112);
   else
      this.View.BackgroundColor = UIColor.White;
}
Add behavior to the slider
We can also use the designer to help us wire up events for UIKit controls.
- Open Main.storyboard.
- Select the slider.
- In the Properties pane, select the Events section.
- In the Value section, type in a method handler name for changed: SliderSize_ValueChanged. Create the partial method declaration as you did in the previous section.
- In the new method, set the fireworks'
ScaleMaxproperty to sliderSize's Value. Hint: You'll need to cast the value to an nfloat. - Run the app. Verify that both the switch and slider work correctly.
partial void SliderSize_ValueChanged (UISlider sender)
{
   fireworks.ScaleMax = (nfloat)sliderSize.Value;
}
Think about which of the techniques we've done. Do you prefer one over the other?
Exercise summary
Congratulations! In this lab, you added behavior to your designer-defined controls programmatically.
You can view the completed solution in the Exercise 3 > Completed folder of your copy of the cloned or downloaded course materials.