Exercise 2: Use Auto Layout in your application
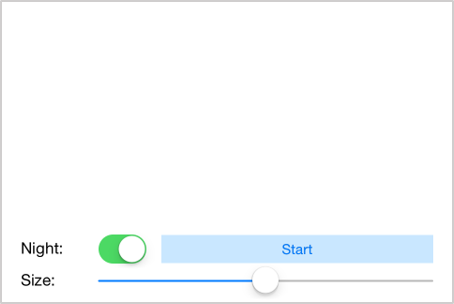
The primary goal of this exercise is to teach you how to update your Fireworks application to use constraints to size and position your views relative to the view controller. The finished UI will look something like this:
To complete the exercise, you will need Visual Studio for Windows or macOS with the Xamarin development tools installed. You will also need either an emulator/simulator or a device to run the exercise on. Please see the setup page if you need help installing the Xamarin development environment.
Open the starter solution
This exercise is a continuation of the previous exercise. You can use your existing solution or begin from the prior Exercise 1 > Completed solution in your copy of the cloned or downloaded course materials.
Apply recommended constraints
For several of the controls, we can use very basic constraints.
- Open Main.storyboard.
- Select the Night: label.
- Switch to Constraint Editing Mode by clicking the toolbar button above the Storyboard's design surface.

- Constrain the left side of the Night: label by dragging the T-shaped handle to the left side of your view controller. Notice how the View's leading margin guideline is displayed in green as soon as you start dragging the handle. This line will turn blue as you move the handle onto it to indicate a value constraint target. You'll use this as a guide to set up the button's leading edge constraint. With only one constraint, our label will be underconstrained.

- Click the constraint warning icon on the bottom-right of your view controller and choose Add constraints to have the designer add the additional "Y position" constraint necessary to fully constrain it.

- Do the same for the adjacent switch, creating the left constraint based on the right of the label we just constrained and having the designer add the other required constraint. (Do not add constraints yet for the button or the slider.)
- Run the application and try rotating the simulator or device to landscape (Hardware > Rotate Left).
Add constraints using the Designer
We want the button to stretch and take up any available space. Adding just the recommended constraints would add fixed value constraints for width and height, so we'll add all the constraints to the button manually.
- Select the button in the designer.
- Ensure you are in Constraint Editing Mode by clicking the toolbar button above the Storyboard's design surface.
- Drag the right-edge T-shaped constraint handle and add a constraint to the right guide of the view controller.
- Edit the constant value of the newly created constraint to
0, either by double-clicking the constraint directly on the designer surface or double-clicking it within Properties > Layout > Constraints.

- Drag the left-edge constraint handle to add a constraint to the left edge of the switch.
- Drag the center constraint handle to add a vertical centering constraint to the switch.
- Run the application and try rotating the simulator or device to landscape mode.

Add constraints to the slider
Repeating what we did with the button, let's constrain the slider.
- Drag the right-edge constraint handle and add a constraint to the right guide of the view controller.
- Drag the left-edge constraint handle to add a constraint to the left edge of the Size: label.
- Drag the center constraint handle to add a vertical centering constraint to the Size: label.
- Run the application and try rotating the simulator or device to landscape.
Exercise summary
Congratulations! In this lab, you added constraints to your views to allow them to dynamically size and position themselves on screen.
You can view the completed solution in the Exercise 2 > Completed folder of your copy of the cloned or downloaded course materials.