Exercise 1: Create and run your first iOS application
The primary goal of this lab is to walk through the creation of a brand new Xamarin.iOS application using Visual Studio on either macOS or Windows. We will then build and run it using the included iOS Simulator from Apple.
To complete the exercise, you will need Visual Studio for Windows or macOS with the Xamarin development tools installed. You will also need either an emulator/simulator or a device to run the exercise on. Please see the setup page if you need help installing the Xamarin development environment.
Create a new solution
In this section, we will walk through the creation of a new Xamarin.iOS application.
- Launch Visual Studio.
- Start the project creation wizard through the File > New > Project... menu option.
- Select the iOS App (Xamarin) template from the Visual C# > iPhone & iPad section.
During the project creation process, you may be prompted to connect to a Xamarin Build Host. For more information, see the Connecting to the Mac.

- Open Visual Studio for Mac.
- Start the project creation wizard through the File > New Solution... menu option.
- Select the Single View App template under the iOS > App section.
- Click the Next button on the lower right to continue.
Select iOS template
- Select the Single View App template.
- Leave the Device Support as Universal to support both iPads and iPhone devices.
- Pick your preferred Minimum iOS Version or leave it at the newest version. (This exercise won't involve any iOS features that should limit backwards-compatibility.)
- Click OK to create the project.

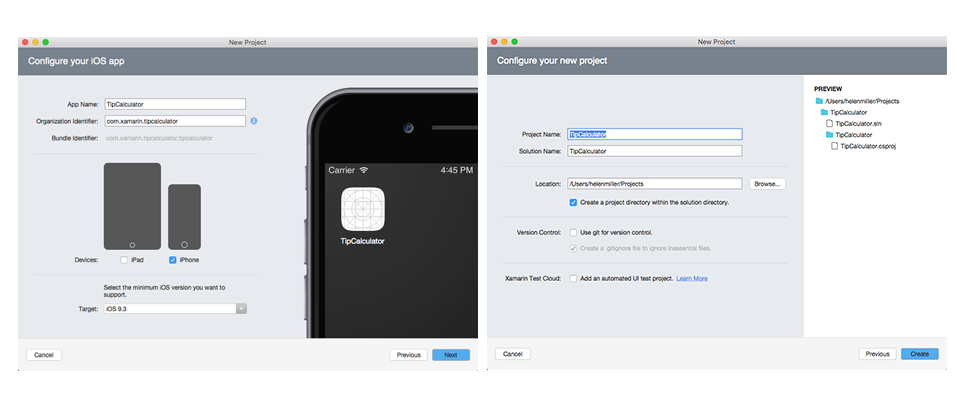
- Name the project TipCalculator as the app name.
- If it isn't already filled in, provide an Organization Identifier in reverse-DNS notation, such as "com.yourcompany". (Your app's name will be appended to the end of this identifier to uniquely represent your application to Apple when you publish the application.)
- Leave the Devices selections checked to support both iPads and iPhone devices.
- Pick your preferred Target iOS version or leave it at the newest version. (This exercise won't involve any iOS features that should limit backwards-compatibility.)
- Click Next to move to the next page.
- Leave the configuration settings on this screen as their defaults and click Create to create the project.
View the solution
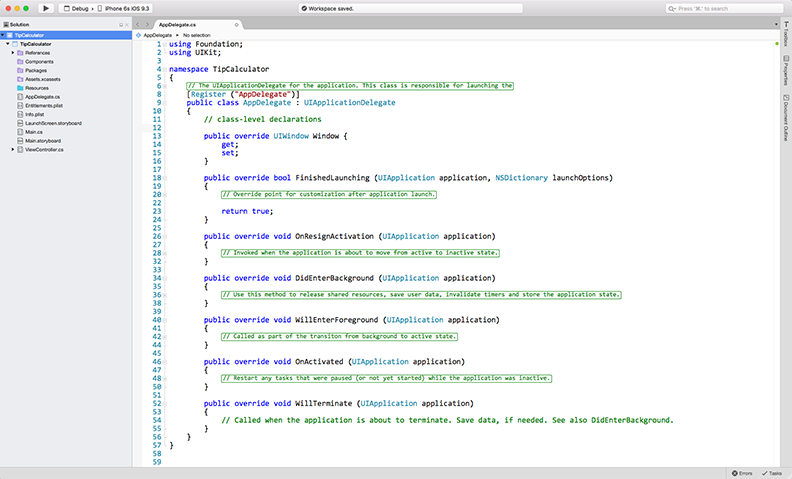
Visual Studio will create and load a new solution with a single iOS project.

Select a simulator
Next, we'll select our deployment target for our new iOS application. We'll use the iOS simulator.
You'll need to be connected to your Mac Build Host for this step.
- Choose iPhoneSimulator from the Solution Platforms dropdown on the Visual Studio toolbar.
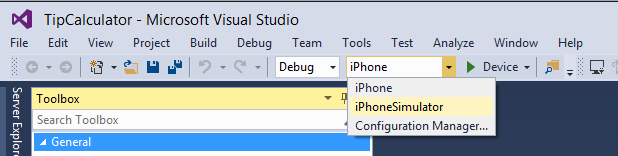
With iPhoneSimulator selected, you can now choose from the avaliable simulators installed on the Mac. The avaliable devices and versions may change when Xcode is updated on the Mac.
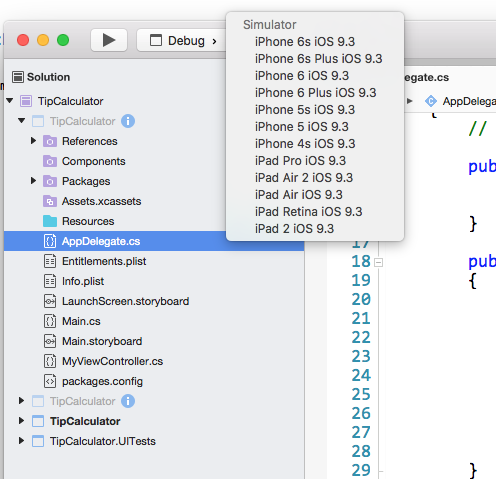
- Select any iPhone simulator.

- Select one of the iPhone simulators from the deployment target drop-down menu on the toolbar:

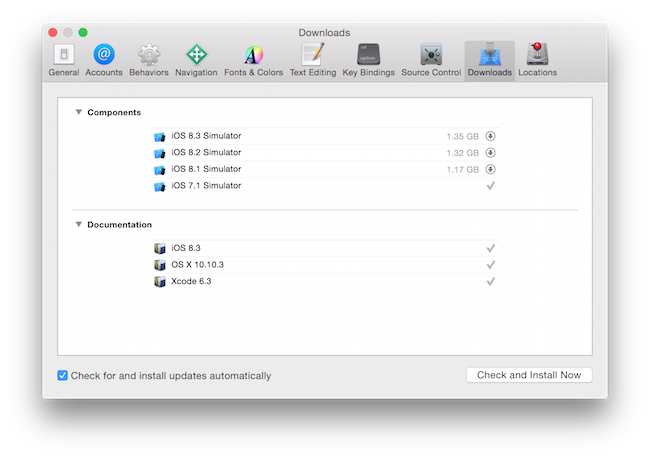
On your macOS machine, open Xcode, and use the Preferences > Downloads > Components dialog. This will list iOS versions you can download and install onto your Mac.
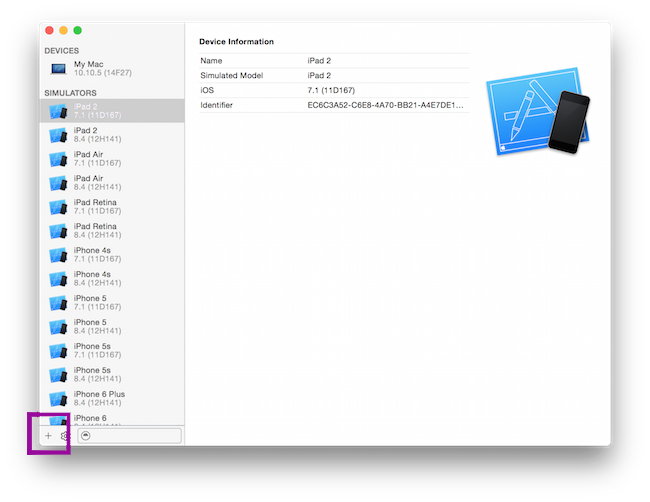
To create new simulator styles, use Window > Devices to open the device list dialog:
You will likely need to restart Visual Studio for Mac to see changes in the simulator list.
Compile the application
Next, compile and deploy the application to the iOS Simulator.
Start the application by clicking the Play button in the toolbar; this will build and launch the application on the simulator. You can also build from the Build menu.

Click the Play button in the toolbar to build and launch the application in the simulator. You can also build from the Build menu or, as mentioned in the discussion, use the ⌘+B accelerator key (look at the menu drop-down to see the accelerator keys).

Run the application
The iOS simulator should launch on your Mac and then run your new application. It should display an empty screen which we will change shortly.
Quick Tip: If you want to launch the iOS simulator independent of Visual Studio for Mac, try adding Xcode to your Dock. Then you can right-click on the icon and select Open Developer Tool > iOS Simulator to quickly launch the simulator.

Exercise summary
Congratulations! You have created a new iOS application using the Single View App template.You can view the completed solution in the Exercise 1 > Completed folder of your copy of the cloned or downloaded course materials.